Showing posts with label Daring Bakers. Show all posts

January 29, 2009

Daring Bakers: Tuiles


This month's challenge is brought to us by Karen (aka Baking Soda) of Bake My Day! and Zorra (aka Kochtopf) of 1x umruehren bitte. They have chosen Tuiles from The Chocolate Book by Angélique Schmeink and Nougatine and Chocolate Tuiles from Michel Roux's Finest Desserts.

According to the Karen, "traditionally, tuiles are thin, crisp almond cookies that are gently molded over a rolling pin or arched form while they are still warm. Once set, their shape resembles the curved French roofing tiles for which they're named. The Dutch angle: traditionally this batter was used to bake flat round cookies on 31st December, representing the year unfold. On New Year's Day however, the same batter was used but this day they were presented to well-wishers shaped as cigars and filled with whipped cream, symbolizing the New Year that's about to roll on."

We had a choice of making the sweet tuiles or a savory version. I went with the savory version, using a muffin pan to form the warm tuiles into cups & filling them with a mushroom caviar.

Savory Tuile/Cornets
from Thomas Keller's The French Laundry Cookbook


Ingredients:
1/4 cup plus 3 tablespoons all purpose flour
1 tablespoon plus 1 teaspoon sugar
1 teaspoon kosher salt
8 tablespoons unsalted butter, softened but still cool to the touch
2 large egg whites, cold
2 tablespoons black sesame seeds (or other seasonings)

Directions:
In a medium bowl, mix together the flour, sugar and salt. In a separate bowl, whisk the softened butter until it is completely smooth and mayonnaise-like in texture. Using a stiff spatula or spoon, beat the egg whites into the dry ingredients until completely incorporated and smooth. Whisk in the softened butter by thirds, scraping the sides of the bowl as necessary and whisking until the batter is creamy and without any lumps. Transfer the batter to a smaller container, as it will be easier to work with.

Preheat the oven to 400 degrees F.

Make a 4-inch hollow circular stencil. Place Silpat on the counter (it is easier to work on the Silpat before it is put on the sheet pan). Place the stencil in one corner of the sheet and, holding the stencil flat against the Silpat, scoop some of the batter onto the back of an offset spatula and spread it in an even layer over the stencil. Then run the spatula over the entire stencil to remove any excess batter. After baking the first batch of cornets, you will be able to judge the correct thickness. You may need a little more or less batter to adjust the thickness of the cornets.

I didn't use a stencil. Instead, I smeared the batter onto the pan with an off-set spatula, trying to make them as round and thin as possible. In hindsight, a stencil would have been easier. I also sprinkled the batter with thyme instead of sesame seeds.

There should not be any holes in the batter. Lift the stencil and repeat the process to make as many rounds as you have molds or to fill the Silpat, leaving about 1 1/2 inches between the cornets. Sprinkle each cornet with a pinch of black sesame seeds.

Place the Silpat on a heavy baking sheet and bake for 4 to 6 minutes, or until the batter is set and you see it rippling from the heat. The cornets may have browned in some areas, but they will not be evenly browned at this point.

I baked my tuiles initially for about 8 minutes, until they were browned. I then removed them from the oven and immediately transfered them to an upside-down muffin pan that sat on the oven door. I was hoping they would cool into cups. I even put them back into the oven that way to warm a bit, thinking they'd sort of "melt" down around the cups. No such luck. They came out only slightly curved. They still worked as cups, though.

NOTE: Keller's signature French Laundry appetizer is cone-shaped tuiles filled with salmon tartare. To make the cornets, follow the directions below.

Open the oven door and place the baking sheet on the door. This will help keep the cornets warm as you roll them and prevent them from becoming too stiff to roll. Flip a cornet over on the sheet pan, sesame seed side down and place 4-1/2 inch cornet mold at the bottom of the round. If you are right-handed, you will want the pointed end on your left and the open end on your right. The tip of the mold should touch the lower left edge (at about 7 o'clock on a clock face) of the cornet.

Fold the bottom of the cornet and around the mold; it should remain on the sheet pan as you roll. Leave the cornet wrapped around the mold and continue to roll the cornets around molds; as you proceed, arrange the rolled cornets, seams side down, on the sheet pan so they lean against each other, to prevent from rolling.

When all the cornets are rolled, return them to the oven shelf, close the door, and bake for an additional 3 to 4 minutes to set the seams and color the cornets a golden brown. If the color is uneven, stand the cornets on end for a minute or so more, until the color is even. Remove the cornets from the oven and allow to cool just slightly, 30 seconds or so.

Gently remove the cornets from the molds and cool for several minutes on paper towels. Remove the Silpat from the baking sheet, wipe the excess butter from it, and allow it to cool down before spreading the next batch. Store the cornets for up to 2 days (for maximum flavor) in an airtight container.

Mushroom "caviar" is simply finely diced shallots & mushrooms sauteed in olive oil & finished with a splash of beef broth & a sprinkling of thyme. I add some grated Parmesan cheese to the finished dish before eating.

November 29, 2008

Daring Bakers: Caramel Cake


This month, the Daring Bakers made Shuna Fish Lydon's Caramel Cake with Caramelized Butter Frosting. The recipe was chosen by Dolores from Culinary Curiosity and her co-hosts: Alex of Blondie and Brownie, Jenny of Foray into Food, & Natalie of Gluten-a-Go-Go.


According to Shuna:

This is one of those cakes that is truly about baking. It may sound strange because aren't all cakes about baking? What I mean is that getting this cake to bake is about balancing fat with acid and protein JUST RIGHT. Gluten free flours are going to have a hard time getting this cake to work. Not impossible, for nothing is impossible these days with all the chemical (natural and icky) at our fingertips, but very very tricky. One hint for the gluten free baker-- liquid Lecithen is your friend.

It would be very easy to get various other flavours in the caramel cake but what's tricky is making sure the flavour does not screw up the liquid-fat-flour ratio too much. Ideas/flavours: Browned Butter, vanilla bean, rosemary, burnt orange, warm spices, etc. Just remember: various flavouring ingredients and agents carry with them their own acidity and moisture contents...

Flavour imparting ingredients can be poached in the caramel once it's done. Even a cold steep would be good with some highly aromatic ingredients, like coffee beans or rosemary. One could make scented sugar and use that in tandem with the sugar in the recipe.
But I will say this about flavours: you will hide and lose the subtlety of the caramel flavour in the cake and that's what this cake is about.


As most people commented on the DB website, this cake is really sweet. To offset the sweetness, I sprinkled the top of the iced cake with a tad less than 1/2 teaspoon of kosher salt...it was like a salted caramel! Yum!

See the tiny brown specks? That's browned butter!

I didn't do anything fancy with my cake. Simply iced the single layer. I did, however, have one problem with it. The cake stuck to the pan, then it stuck to the cooling rack. Oh well...that's what icing is for, I guess!
CARAMEL SYRUP

2 cups sugar
1/2 cup water
1 cup water (for "stopping" the caramelization process)
  • In a small stainless steel saucepan, with tall sides, mix water and sugar until mixture feels like wet sand. Brush down any stray sugar crystals with wet pastry brush. Turn on heat to highest flame. Cook until smoking slightly & dark amber.
  • When color is achieved, very carefully pour in one cup of water. Caramel will jump and sputter about! It is very dangerous, so have long sleeves on and be prepared to step back.
  • Whisk over medium heat until it has reduced slightly and feels sticky between two fingers. (Obviously, wait for it to cool on a spoon before touching it.)
Note: For safety reasons, have ready a bowl of ice water to plunge your hands into if any caramel should land on your skin.

CARAMEL CAKE


10 tablespoons unsalted butter at room temperature
1 1/4 cups granulated sugar
1/2 teaspoon kosher salt
1/3 cup Caramel Syrup
2 each eggs, at room temperature
splash vanilla extract
2 cups all-purpose flour
1/2 teaspoon baking powder
1 cup milk, at room temperature
  • Preheat oven to 350F.
  • Butter one tall (2 – 2.5 inch deep) 9-inch cake pan.
  • In the bowl of a stand mixer fitted with a paddle attachment, cream butter until smooth. Add sugar and salt & cream until light and fluffy.
  • Slowly pour room temperature caramel syrup into bowl. Scrape down bowl and increase speed. Add eggs/vanilla extract a little at a time, mixing well after each addition. Scrape down bowl again, beat mixture until light and uniform.
  • Sift flour and baking powder.
  • Turn mixer to lowest speed, and add one third of the dry ingredients. When incorporated, add half of the milk, a little at a time. Add another third of the dry ingredients, then the other half of the milk and finish with the dry ingredients.
  • Take off mixer and by hand, use a spatula to do a few last folds, making sure batter is uniform. Turn batter into prepared cake pan.
  • Place cake pan on cookie sheet or 1/2 sheet pan. Set first timer for 30 minutes, rotate pan and set timer for another 15-20 minutes. Your own oven will set the pace. Bake until sides pull away from the pan and skewer inserted in middle comes out clean. Cool cake completely before icing it.
  • Cake will keep for three days outside of the refrigerator.

CARAMELIZED BUTTER FROSTING


12 tablespoons unsalted butter
1 pound confectioner’s sugar, sifted
4-6 tablespoons heavy cream
2 teaspoons vanilla extract (I didn't add vanilla to mine.)
2-4 tablespoons caramel syrup
Kosher or sea salt to taste
  • Cook butter until brown. Pour through a fine meshed sieve into a heatproof bowl, set aside to cool.
  • Pour cooled brown butter into mixer bowl.
  • In a stand mixer fitted with a paddle or whisk attachment, add confectioner's sugar a little at a time. When mixture looks too chunky to take any more, add a bit of cream and or caramel syrup. Repeat until mixture looks smooth and all confectioner's sugar has been incorporated. Add vanilla. Add salt to taste.
Note: Caramelized butter frosting will keep in fridge for up to a month. To smooth out from cold, microwave a bit, then mix with paddle attachment until smooth and light

October 29, 2008

Daring Bakers: Pizza

This month's Daring Bakers challenge was chosen by Rosa of Rosa's Yummy Yums. I was, as usual, excited about the recipe...pizza! I'd yet to make my own dough. But, once again (*sigh*) I waited until the last minute and made the pizzas last night.

Photobucket

Several weeks ago, Jerad and I had a pizza throwdown using dough from Trader Joe's. I made my pizza first, but his was much better since he learned from my mistakes. Since I had to make pizza for the Daring Bakers, I challenged Jerad to a Pizza Throwdown 2.0. This time, I made him go first.

I think both pizzas were very good, so we're calling this pizza throwndown a toss-up! (Get it?) The dough was easy and so tasty! It was much less challenging that I expected. The most difficult part is planning ahead!


Photobucket
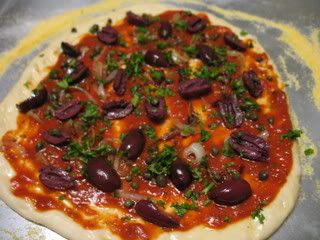
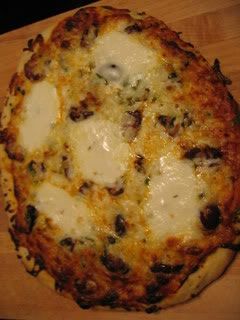
I went puttanesca style, topping my pizza with tomato & anchovy sauce (with red pepper flakes), caramelized onions, kalamata olives, capers, & parsley.

Photobucket
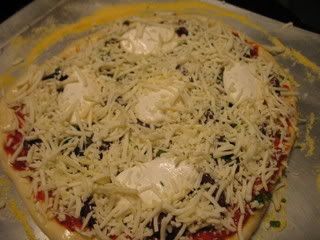
I then added fresh mozzarella slices & shredded mozzarella.

Photobucket
Jerad topped his with onions, pepperoni, mushrooms, & provel cheese.


~ BASIC PIZZA DOUGH ~

Original recipe taken from “The Bread Baker’s Apprentice”
by Peter Reinhart.

Makes 6 pizza crusts (about 9-12 inches in diameter).

Ingredients:
4 1/2 cups unbleached bread flour or all purpose flour, chilled
1 3/4 teaspoon salt
1 teaspoon instant yeast
1/4 cup olive oil
1 3/4 cups water, ice cold
1 tablespoon sugar
Semolina/durum flour or cornmeal for dusting

DAY ONE

Method:
1. Mix together the flour, salt and instant yeast in a big bowl (or in the bowl of your stand mixer).

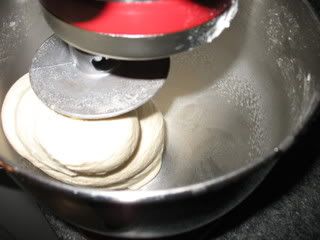
2. Add the oil, sugar and cold water and mix well (with the help of a large wooden spoon or with the paddle attachment, on low speed) in order to form a sticky ball of dough. On a clean surface, knead for about 5-7 minutes, until the dough is smooth and the ingredients are homogeneously distributed. If it is too wet, add a little flour (not too much, though) and if it is too dry add 1 or 2 teaspoons extra water.

NOTE: If you are using an electric mixer, switch to the dough hook and mix on medium speed for the same amount of time.The dough should clear the sides of the bowl but stick to the bottom of the bowl. If the dough is too wet, sprinkle in a little more flour, so that it clears the sides. If, on the contrary, it clears the bottom of the bowl, dribble in a teaspoon or two of cold water.
The finished dough should be springy, elastic, and sticky, not just tacky, and register 50°-55° F.


Photobucket

3. Flour a work surface or counter. Line a jelly pan with baking paper/parchment. Lightly oil the paper.

4. With the help of a metal or plastic dough scraper, cut the dough into 6 equal pieces (or larger if you want to make larger pizzas).

NOTE: To avoid the dough from sticking to the scraper, dip the scraper into water between cuts.

5. Sprinkle some flour over the dough. Make sure your hands are dry and then flour them. Gently round each piece into a ball.

NOTE: If the dough sticks to your hands, then dip your hands into the flour again.

Photobucket
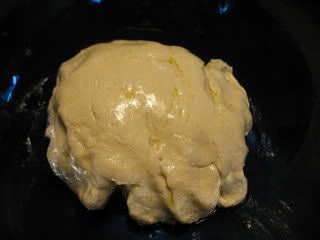
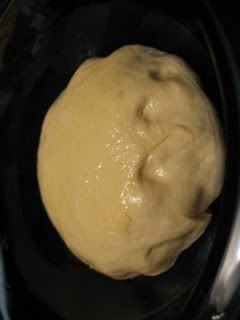
Dough before rising.

6. Transfer the dough balls to the lined jelly pan and mist them generously with spray oil. Slip the pan into plastic bag or enclose in plastic food wrap.

7. Put the pan into the refrigerator and let the dough rest overnight or for up to three days.

NOTE: You can store the dough balls in a zippered freezer bag if you want to save some of the dough for any future baking. In that case, pour some oil(a few tablespoons only) in a medium bowl and dip each dough ball into the oil, so that it is completely covered in oil. Then put each ball into a separate bag. Store the bags in the freezer for no longer than 3 months. The day before you plan to make pizza, remember to transfer the dough balls from the freezer to the refrigerator.

Photobucket
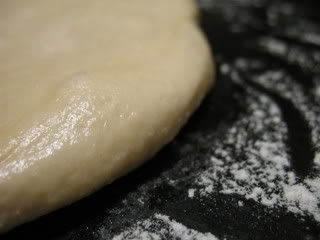
Dough after rising.

DAY TWO

8. On the day you plan to eat pizza, exactly 2 hours before you make it, remove the desired number of dough balls from the refrigerator. Dust the counter with flour and spray lightly with oil. Place the dough balls on a floured surface and sprinkle them with flour. Dust your hands with flour and delicately press the dough into disks about 1/2 inch thick and 5 inches in diameter. Sprinkle with flour and mist with oil. Loosely cover the dough rounds with plastic wrap and then allow to rest for 2 hours.

9. At least 45 minutes before making the pizza, place a baking stone on the lower third of the oven. Preheat the oven as hot as possible (500° F/260° C).

NOTE: If you do not have a baking stone, then use the back of a jelly pan. Do not preheat the pan.

10. Generously sprinkle the back of a jelly pan with semolina/durum flour or cornmeal. Flour your hands (palms, backs and knuckles). Take 1 piece of dough by lifting it with a pastry scraper. Lay the dough across your fists in a very delicate way and carefully stretch it by bouncing it in a circular motion on your hands, and by giving it a little stretch with each bounce. Once the dough has expanded outward, move to a full toss.

NOTE: Make only one pizza at a time. During the tossing process, if the dough tends to stick to your hands, lay it down on the floured counter and reflour your hands, then continue the tossing and shaping. In case you would be having trouble tossing the dough or if the dough never wants to expand and always springs back, let it rest for approximately 5-20 minutes in order for the gluten to relax fully,then try again. You can also resort to using a rolling pin, although it isn’t as effective as the toss method.

Photobucket

11. When the dough has the shape you want (about 9-12 inches in diameter - for a 6 ounces piece of dough), place it on the back of the jelly pan, making sure there is enough semolina/durum flour or cornmeal to allow it to slide and not stick to the pan.

12. Lightly top it with sweet or savory toppings of your choice.

NOTE: Remember that the best pizzas are topped not too generously. No more than 3 or 4 toppings (including sauce and cheese) are sufficient.

13. Slide the garnished pizza onto the stone in the oven or bake directly on the jelly pan. Close the door and bake for about 5-8 minutes.

NOTE: After 2 minutes baking, take a peek. For an even baking, rotate 180°.

If the top gets done before the bottom, you will need to move the stone or jelly pane to a lower shelf before the next round. On the contrary, if the bottom crisps before the cheese caramelizes, then you will need to raise the stone or jelly.


14. Take the pizza out of the oven and transfer it to a cutting board or your plate. In order to allow the cheese to set a little, wait 3-5 minutes before slicing or serving.

Photobucket

September 1, 2008

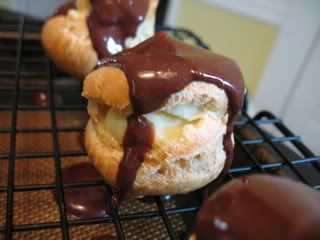
Daring Bakers: Chocolate (and Ginger) Eclairs


Ok, I admit it...I've been a not-so-daring baker. Since joining the Daring Bakers group in March, I've missed two months...both cakes. I just wasn't into the cakes. *sigh*

However, I was excited to see that this month's recipe, chosen by Meeta and Tony, was for chocolate eclairs. I've never made eclairs, so this would give me a chance to try my hand at pate a choux dough and pastry cream.

But then...

I got that new teaching job a few weeks before school started, and I was frantically trying to get my classroom ready and figure out what the heck I was supposed to be teaching.

Still, I remembered the August DB challenge in the back of my mind and looked forward to a day off so I could make those chocolate eclairs.

And then yesterday, I realized that August 31 was the posting day. And I hadn't made the eclairs yet! I thought for sure that I would do them yesterday. I had planned on it.

But then...

I had to bake that apple tart tatin because the farmers' market apples were expiring on the counter. I didn't feel much like baking eclairs after that...and after cleaning, doing laundry, and making a webpage for my classes.

Today, in between more cleaning, more laundry, and more lesson planning, I've managed to make those @#$% eclairs! No, really, I did enjoy it. Such a feeling of accomplishment...

There is, of course, an advantage to waiting until the last minute...seeing what everyone else has done! And learning from their mistakes.

The rules this month were simple: We had to use the choux dough as follows and keep one of the chocolate elements (either the chocolate pastry cream or the chocolate glaze.)

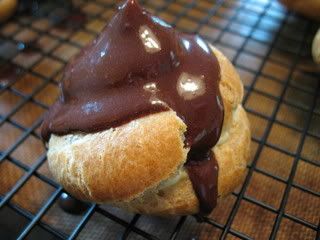
I chose to keep the glaze (which was time-consuming & sort of redundant), while making a ginger pastry cream.

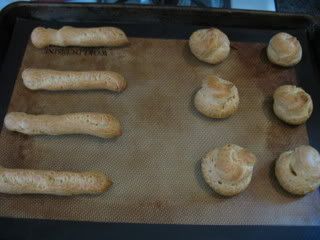
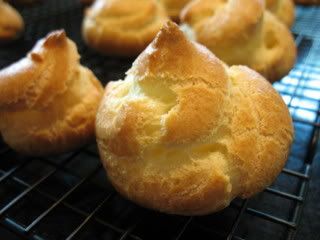
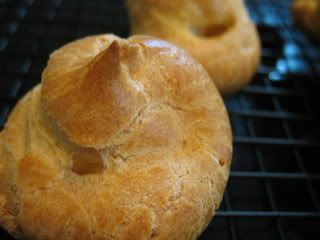
For the first batch of eclairs, I piped some strips to form the traditional "long johns" and some spiraly circles. The strips didn't puff up enough to become finished eclairs (they looked like fingers), but the circles came out nicely.

Photobucket

I did all larger circles for the second batch, and I thought they turned out the best.

Photobucket

Also, several people wrote about how their shells fell after taken out of the oven. The remedy, it seems, is to bake them longer than the 20-minutes as the recipe says. I baked mine 10 minutes longer, checking after 5 minutes to make sure the bottoms weren't burning.

Photobucket

Chocolate & Ginger Eclairs

(makes 20-24 eclairs)

I prepared the cream first, to give it time to chill while I baked the eclair shells. As the shells were cooling, I made the chocolate glaze.

Ginger Pastry Cream
adapted from Dorie Greenspan's Baking: From My Home to Yours

2 cups whole milk
2 heaping tablespoons candied ginger, finely chopped
6 large egg yolks
1/2 cup sugar
1/3 cup cornstarch, sifted
1 1/2 teaspoons vanilla extract
3 1/2 tablespoons unsalted butter, cut into bits, at room temperature
  • Bring the milk and ginger to a boil in a small saucepan.
  • Meanwhile, in a medium heavy-bottomed saucepan, whisk the yolks together with the sugar and cornstarch until thick and well-blended.
  • While whisking, drizzle about 1/4 cup of the hot milk into the yolks to temper them.
  • Whisking all the while, slowly pour in the remainder of the milk.
  • Put the pan over medium-low heat and, whisking vigorously & constantly & thoroughly, bring the mixture to a boil.
  • Keep boiling & whisking for 1-2 minutes, then remove the pan from the heat.
  • Whisk in the vanilla.
  • Then, whisk in the butter, stirring until they are fully incorporated and the cream is smooth & silky.
  • Transfer the pastry cream to a small bowl. Press a piece of plastic wrap against the surface and refrigerate until ready to use.
Notes:
  1. The pastry cream can be made 2‐3 days in advance and stored in the refrigerator.

Choux (aka Cream Puff) Dough
recipe from Chocolate Desserts by Pierre Herme

½ cup whole milk
½ cup water
1 stick unsalted butter, cut into 8 pieces
¼ teaspoon sugar
¼ teaspoon salt
1 cup all-purpose flour
5 large eggs, at room temperature
  • In a heavy bottomed medium saucepan, bring the milk, water, butter, sugar and salt to a boil.
  • Once the mixture is at a rolling boil, add all of the flour at once, reduce the heat to medium and start to stir the mixture vigorously with a wooden spoon. The dough comes together very quickly. Do not worry if a slight crust forms at the bottom of the pan, it’s supposed to. You need to carry on stirring for a further 2-3 minutes to dry the dough. After this time the dough will be very soft and smooth.
  • Transfer the dough into a bowl of a mixer fitted with the paddle attachment, or using your handmixer or if you still have the energy, continue by hand. Add the eggs one at a time, beating after each egg has been added to incorporate it into the dough. You will notice that after you have added the first egg, the dough will separate, once again do not worry. As you keep working the dough, it will come back all together again by the time you have added the third egg. In the end the dough should be thick and shiny and when lifted it should fall back into the bowl in a ribbon. (Mine was actually very thick, no ribbons here. I wonder why...)
  • The dough should be still warm. It is now ready to be used for the éclairs.
  • Preheat your oven to 375 degrees F. Divide the oven into thirds by positioning the racks in the upper and lower half of the oven. Line two baking sheets with waxed paper, parchment paper, or silicone baking mats.
  • Fill a large pastry bag fitted with a 2/3 plain tip nozzle with the warm cream puff dough. Pipe the dough onto the baking sheets in long, 4 to 41/2 inches chubby fingers. Leave about 2 inches space in between each dough strip to allow them room to puff. The dough should give you enough to pipe 20-24 éclairs.
  • Slide both the baking sheets into the oven and bake for 7 minutes. After the 7 minutes, slip the handle of a wooden spoon into the door to keep in ajar. When the éclairs have been in the oven for a total of 12 minutes, rotate the sheets top to bottom and front to back. Continue baking for a further 8 minutes or until the éclairs are puffed, golden and firm. The total baking time should be approximately 20 minutes. (But really, you need to bake them 10-15 minutes more.)
  • Remove the shells from the oven and transfer to a cooling rack.
Notes:
  1. Once the dough is made you need to shape it immediately.
  2. You can pipe the dough and the freeze it. Simply pipe the dough onto parchment-lined baking sheets and slide the sheets into the freezer. Once the dough is completely frozen, transfer the piped shapes into freezer bags. They can be kept in the freezer for up to a month.
  3. The éclairs can be kept in a cool, dry place for several hours before filling.
Photobucket

Chocolate Glaze
recipe from Chocolate Desserts by Pierre Herme
(makes 1 cup)

1/3 cup heavy cream
3½ oz bittersweet chocolate, finely chopped
4 teaspoons unsalted butter, cut into 4 pieces, at room temperature
7 tablespoons Chocolate Sauce (recipe below), warm or at room temperature
  • In a small saucepan, bring the heavy cream to a boil. Remove from the heat and slowly begin to add the chocolate, stirring with a wooden spoon or spatula.
  • Stirring gently, stir in the butter, piece by piece followed by the chocolate sauce.
Notes:
  1. If the chocolate glaze is too cool (i.e. not liquid enough) you may heat it briefly in the microwave or over a double boiler.
  2. It is best to glaze the eclairs after the glaze is made, but if you are pressed for time, you can make the glaze a couple days ahead of time, store it in the fridge and bring it up to the proper temperature (95 to 104 F) when ready to glaze.

Chocolate Sauce
(makes 1½ cups)

4½ oz bittersweet chocolate, finely chopped
1 cup water
½ cup crème fraîche or heavy cream
1/3 cup sugar
  • Place all the ingredients into a heavy‐bottomed saucepan and bring to a boil, making sure to stir constantly. Then reduce the heat to low and continue stirring with a wooden spoon until the sauce thickens.
  • It may take 10‐15 minutes for the sauce to thicken, but you will know when it is done when it coats the back of your spoon.
Notes:
  1. You can make this sauce ahead of time and store it in the refrigerator for two weeks. Reheat the sauce in a microwave oven or a double boiler before using.
  2. This sauce is also great for cakes, ice-cream and tarts.

Assembling the éclairs:
  • Slice the éclairs horizontally, using a serrated knife and a gently sawing motion. Set aside the bottoms and place the tops on a rack over a piece of parchment paper.
Photobucket
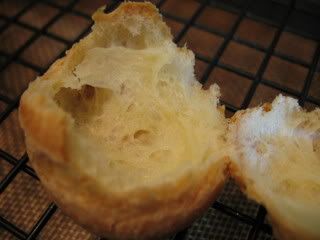
The puffs are hollow in the middle, so I just used my fingers to gently nudge the top apart on the circles.
  • The glaze should be barely warm to the touch (between 95 – 104 degrees F, as measured on an instant read thermometer). Spread the glaze over the tops of the éclairs using a metal icing spatula. Allow the tops to set and in the meantime fill the bottoms with the pastry cream.
  • Pipe or spoon the pastry cream into the bottoms of the éclairs. Make sure you fill the bottoms with enough cream to mound above the pastry. Place the glazed tops onto the pastry cream and wriggle gently to settle them.
Notes:
  1. If you have chilled your chocolate glaze, reheat by placing it in a bowl over simmering water, stirring it gently with a wooden spoon. Do not stir too vigorously as you do not want to create bubbles.
  2. The éclairs should be served as soon as they have been filled.
Photobucket


June 29, 2008

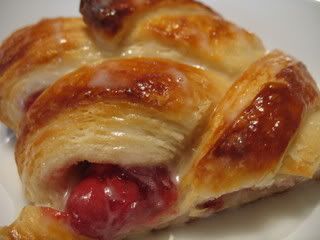
Daring Bakers: Danish Braid (finally!)

Kelly of Sass & Veracity and Ben of What's cooking? chose this month's Daring Bakers recipe.

I just love how things worked out for me this month. I learned to make croissants last weekend, and this dough is also a laminated dough (one which is layered with butter, then folded and rolled out several times). So, I felt confident to try this at home.

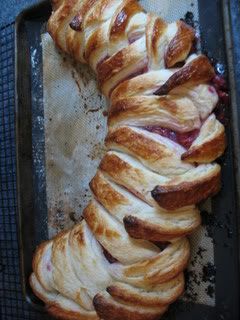
I made a whole batch of dough, but used half to make croissants for breakfast. The other half became the danish braid, which I filled with fresh sour cherries that I bought at the farmers market yesterday.

Photobucket

DANISH BRAID

Makes enough for 2 large braids

Ingredients
1 recipe Danish Dough (see below)
2 cups fruit filling, jam or preserves (see below)
For the egg wash: 1 large egg, plus 1 large egg yolk
  • Line a baking sheet with a silicone mat or parchment paper. On a lightly floured surface, roll the Danish Dough into a 15 x 20-inch rectangle, ¼ inch thick. If the dough seems elastic and shrinks back when rolled, let it rest for a few minutes, then roll again. Place the dough on the baking sheet.
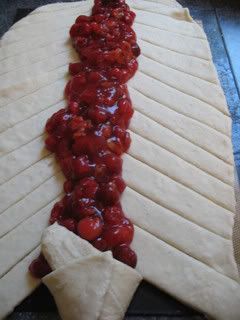
  • Along one long side of the pastry make parallel, 5-inch-long cuts with a knife or rolling pastry wheel, each about 1 inch apart. Repeat on the opposite side, making sure to line up the cuts with those you’ve already made.
  • Spoon the filling you’ve chosen to fill your braid down the center of the rectangle. Starting with the top and bottom “flaps”, fold the top flap down over the filling to cover. Next, fold the bottom “flap” up to cover filling. This helps keep the braid neat and helps to hold in the filling. Now begin folding the cut side strips of dough over the filling, alternating first left, then right, left, right, until finished. Trim any excess dough and tuck in the ends.
Photobucket
I didn't really pay close attention to the size and number of "flaps" I cut on the braid, and so it was thicker on one end.
  • For the Egg Wash: Whisk together the whole egg and yolk in a bowl and with a pastry brush, lightly coat the braid.
Proofing and Baking
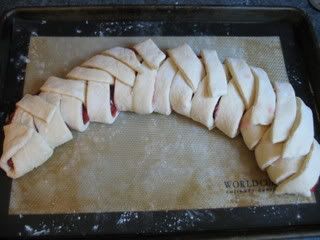
  • Spray cooking oil (Pam…) onto a piece of plastic wrap, and place over the braid. Proof at room temperature or, if possible, in a controlled 90 degree F environment for about 2 hours, or until doubled in volume and light to the touch.
Photobucket
I rolled the dough a bit too big for my pan, so I had to curve the braid.
  • Near the end of proofing, preheat oven to 400 degrees F. Position a rack in the center of the oven.
  • Bake for 10 minutes, then rotate the pan so that the side of the braid previously in the back of the oven is now in the front. Lower the oven temperature to 350 degrees F, and bake about 15-20 minutes more, or until golden brown.
Photobucket
My braid came undone a bit during baking, but it was still delish!
  • Cool and serve the braid either still warm from the oven or at room temperature. The cooled braid can be wrapped airtight and stored in the refrigerator for up to 2 days, or freeze for 1 month.

DANISH DOUGH


Makes 2-1/2 pounds dough (enough for two braids)

Ingredients

For the dough:

1 ounce fresh yeast or 1 tablespoon active dry yeast
1/2 cup whole milk
1/3 cup sugar
Zest of 1 orange, finely grated
3/4 teaspoon ground cardamom
1-1/2 teaspoons vanilla extract
1/2 vanilla bean, split and scraped
2 large eggs, chilled
1/4 cup fresh orange juice
3-1/4 cups all-purpose flour
1 teaspoon salt

For the butter block:
1/2 pound (2 sticks) cold unsalted butter
1/4 cup all-purpose flour

Dough
  • Combine yeast and milk in the bowl of a mixer fitted with the paddle attachment and mix on low speed. Slowly add sugar, orange zest, cardamom, vanilla extract, vanilla seeds, eggs, and orange juice. Mix well. Change to the dough hook and add the salt with the flour, 1 cup at a time, increasing speed to medium as the flour is incorporated. Knead the dough for about 5 minutes, or until smooth. You may need to add a little more flour if it is sticky. Transfer dough to a lightly floured baking sheet and cover with plastic wrap. Refrigerate for 30 minutes.
  • Without a standing mixer: Combine yeast and milk in a bowl with a hand mixer on low speed or a whisk. Add sugar, orange zest, cardamom, vanilla extract, vanilla seeds, eggs, and orange juice and mix well. Sift flour and salt on your working surface and make a fountain. Make sure that the “walls” of your fountain are thick and even. Pour the liquid in the middle of the fountain. With your fingertips, mix the liquid and the flour starting from the middle of the fountain, slowly working towards the edges. When the ingredients have been incorporated start kneading the dough with the heel of your hands until it becomes smooth and easy to work with, around 5 to 7 minutes. You might need to add more flour if the dough is sticky.
Butter Block
  • Combine butter and flour in the bowl of a mixer fitted with a paddle attachment and beat on medium speed for 1 minute. Scrape down the sides of the bowl and the paddle and then beat for 1 minute more, or until smooth and lump free. Set aside at room temperature.
  • After the detrempe has chilled 30 minutes, turn it out onto a lightly floured surface. Roll the dough into a rectangle approximately 18 x 13 inches and ¼ inch thick. The dough may be sticky, so keep dusting it lightly with flour. Spread the butter evenly over the center and right thirds of the dough. Fold the left edge of the detrempe to the right, covering half of the butter. Fold the right third of the rectangle over the center third. The first turn has now been completed. Mark the dough by poking it with your finger to keep track of your turns, or use a sticky and keep a tally. Place the dough on a baking sheet, wrap it in plastic wrap, and refrigerate for 30 minutes.
  • Place the dough lengthwise on a floured work surface. The open ends should be to your right and left. Roll the dough into another approximately 13 x 18 inch, ¼-inch-thick rectangle. Again, fold the left third of the rectangle over the center third and the right third over the center third. No additional butter will be added as it is already in the dough. The second turn has now been completed. Refrigerate the dough for 30 minutes.
  • Roll out, turn, and refrigerate the dough two more times, for a total of four single turns. Make sure you are keeping track of your turns. Refrigerate the dough after the final turn for at least 5 hours or overnight. The Danish dough is now ready to be used. If you will not be using the dough within 24 hours, freeze it. To do this, roll the dough out to about 1 inch in thickness, wrap tightly in plastic wrap, and freeze. Defrost the dough slowly in the refrigerator for easiest handling. Danish dough will keep in the freezer for up to 1 month.
SOUR CHERRY FILLING

Photobucket
I have so many cherries! Look for more recipes here soon!

Makes enough for two braids

Ingredients
2 pounds of fresh sour cherries, pitted
1/2 cup sugar
1 tsp. ground cinnamon
2 tablespoons corn starch
1/2 cup water (or more if needed)

Photobucket
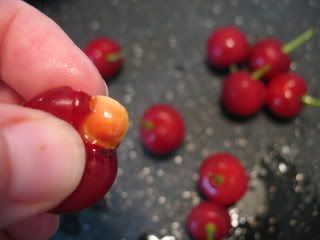
Ripe cherries are easy to pit by gently squeezing them.

Toss all ingredients in a small saucepan. Bring to a boil over medium heat, then lower heat and simmer 2 minutes or until thickened. Thin with a bit more water if needed. Transfer to a bowl and let cool to room temperature.

Photobucket
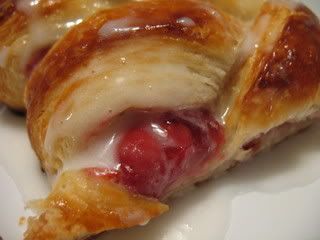
I also topped each piece of the braid with a thin glaze of powdered sugar and milk.

April 27, 2008

Cheesecake Pops

Photobucket

This month's Daring Bakers challenge was chosen by Elle of Feeding My Enthusiasms & Deborah of Taste and Tell.

Even though I was excited about this recipe and talked up making it for several weeks, I waited until the last minute to get it done...making the cheesecake Thursday night and putting together the pops Friday evening. Thankfully, my friend Margaret was here Friday to help me finish them up.

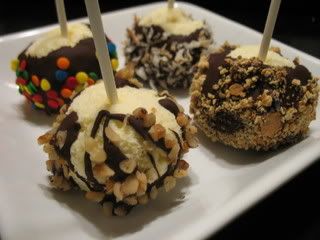
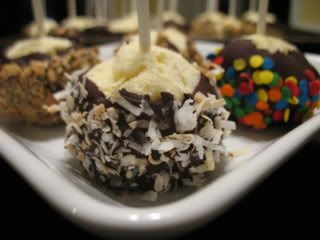
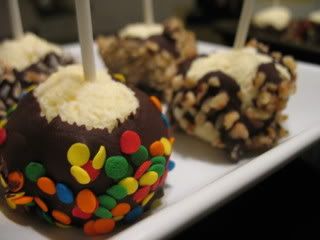
We dipped the frozen cheesecake balls in melted bittersweet chocolate then rolled them in crushed graham crackers, chopped walnuts, toasted coconut, lavender, and candy dots.

They are very yummy...and fun to make! Oh, and fairly easy, too! You basically just make a crustless cheesecake, chill it, then roll it into balls, stab 'em with a lollipop stick, freeze, dip, & decorate. These would be great for a birthday party or shower.

Cheesecake Pops
Makes 30–40 Pops

Photobucket

5 8-oz. packages cream cheese at room temperature
2 cups sugar
¼ cup all-purpose flour
¼ teaspoon salt
5 large eggs
2 egg yolks
2 teaspoons pure va
nilla extract
¼ cup heavy cream
Boiling water as needed
Thirty to forty 8-inch lollipop sticks

1 pound chocolate, finely chopped – you can use all one kind or half and half of dark, milk, or white (Alternately, you can use 1 pound of flavored coatings, also known as summer coating, confectionary coating or wafer chocolate – candy supply stores carry colors, as well as the three kinds of chocolate.)

2 tablespoons vegetable shortening

Assorted decorations such as chopped nuts, colored jimmies, crushed peppermints, mini chocolate chips, sanding sugars, dragees) - Optional

  • Position oven rack in the middle of the oven and preheat to 325 degrees F. Set some water to boil.
  • In a large bowl, beat together the cream cheese, sugar, flour, and salt until smooth. If using a mixer, mix on low speed. Add the whole eggs and the egg yolks, one at a time, beating well (but still at low speed) after each addition. Beat in the vanilla and cream.
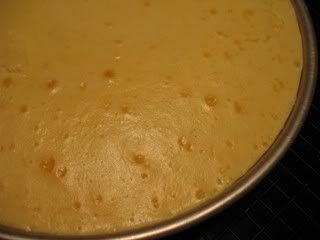
  • Grease a 10-inch cake pan (not a springform pan), and pour the batter into the cake pan. Place the pan in a larger roasting pan. Fill the roasting pan with the boiling water until it reaches halfway up the sides of the cake pan. Bake until the cheesecake is firm and slightly golden on top, 35 to 45 minutes.
Photobucket
  • Remove the cheesecake from the water bath and cool to room temperature. Cover the cheesecake with plastic wrap and refrigerate until very cold, at least 3 hours or up to overnight.
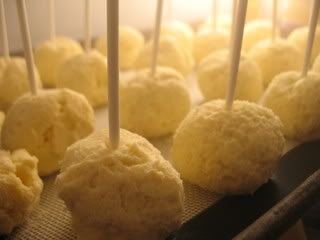
  • When the cheesecake is cold and very firm, scoop the cheesecake into 2-ounce balls and place on a parchment paper-lined baking sheet. Carefully insert a lollipop stick into each cheesecake ball. Freeze the cheesecake pops, uncovered, until very hard, at least 1 – 2 hours.
Photobucket
  • When the cheesecake pops are frozen and ready for dipping, prepare the chocolate. In the top of a double boiler, set over simmering water, or in a heatproof bowl set over a pot of simmering water, heat half the chocolate and half the shortening, stirring often, until chocolate is melted and chocolate and shortening are combined. Stir until completely smooth. Do not heat the chocolate too much or your chocolate will lose it’s shine after it has dried. Save the rest of the chocolate and shortening for later dipping, or use another type of chocolate for variety. (Alternately, you can microwave the same amount of chocolate coating pieces on high at 30 second intervals, stirring until smooth.)
  • Quickly dip a frozen cheesecake pop in the melted chocolate, swirling quickly to coat it completely. Shake off any excess into the melted chocolate. If you like, you can now roll the pops quickly in optional decorations. You can also drizzle them with a contrasting color of melted chocolate (dark chocolate drizzled over milk chocolate or white chocolate over dark chocolate, etc.) Place the pop on a clean parchment paper-lined baking sheet to set. Repeat with remaining pops, melting more chocolate and shortening (or confectionary chocolate pieces) as needed.
Photobucket
  • Refrigerate the pops for up to 24 hours, until ready to serve.
Photobucket

Photobucket

March 30, 2008

I am a Daring Baker.

So, I’ve joined another baking/blogging group. You see, as I’ve said numerous times before, I am not a baker. But, I thought joining a couple baking groups would inspire me to make things I wouldn’t normally.

Photobucket

The Daring Bakers are a group of bloggers who all make the same recipe once a month. The recipe is kept secret from the non-daring bakers until the post date.

I’d been seeing the Daring Bakers pop up in the blogosphere and decided to join to see what it’s all about. Membership allows me access to the secret blog, where recipes and discussions are posted.

I was excitedly anticipating the reveal of my first daring recipe, the choice for March’s challenge.

January’s recipes was for lemon meringue pie. Fairly easy, I thought. But, then I saw what some of those people did with lemon meringue pie. Fancy-schmancy. I’m in trouble, I thought.

Then, I saw the recipe for February...Julia Child’s French Baguettes. I’m doomed, I thought. I had managed no-knead bread, but there is no way I could handle classic French bread...a recipe that takes up like a dozen pages in Child’s Mastering the Art of French Cooking.

I got nervous. What would the next recipe be? Would I be able to manage it? Or would I crack? Would I not live up to the Daring Baker credo? Would I not get that oh-so-cute logo to slap on my blog? Oh no!

But, I was pleasantly surprised to discover that the recipe was for a “Perfect Party Cake” from Dorie Greenspan’s Baking: From my Home to Yours...the same book from which the Tuesdays with Dorie group bakes.

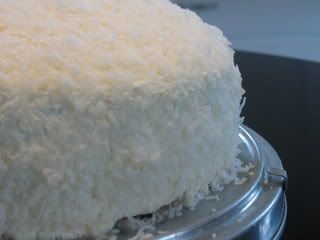
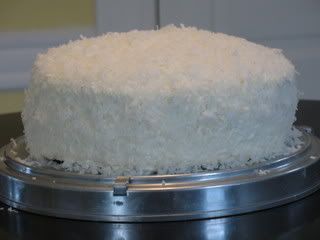
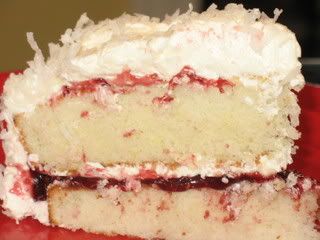
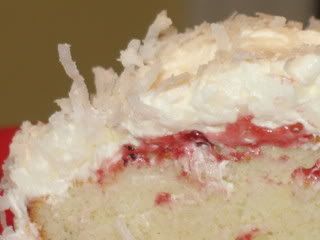
This dessert is a lemon cake with raspberry filling, lemon meringue buttercream, and coconut...the perfect choice for spring. The coconut-covered cake reminded me of that lamb cake my Grandma Green used make each year for Easter. So, in homage, I made the cake on Easter Sunday.

Photobucket

I’d never made a meringue buttercream before, but thought it was pretty easy...even though I whipped the egg whites & sugar by hand (I can’t find my KitchenAid whip attachment). The icing becomes fluffy and light...so good. It’s something I will definitely make again.

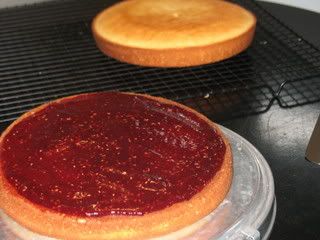
I did have a bit of a problem with the cake, though. My oven seems to be a bit off-kilter, so cake batter runs to the back of the pans & causes the cakes to come out unevenly. I can compensate for this by stacking the cakes with the thin sides lined up to the thick sides. However, this recipe called for slicing each cake in half to form four layers. I didn’t think that would work, because the thin sides were really thin. Instead, I decided to just make a two-layer cake with more raspberry filling.

Photobucket

Unfortunately, I added a bit too much raspberry and the cakes wouldn’t stay still. The top layer kept sliding around, making it a bit difficult to ice–and later slice–the whole thing. The layers didn’t really stick together...until later, once some of the filling soaked into the cake.

Nevertheless, I was pretty proud of my homemade cake. This baking thing isn’t so hard, I thought.

Photobucket

Then, I saw everyone else’s cakes on our secret bakers blog. Gulp. Fancy again! There were snazzy icing jobs & decorations galore. I felt so...boring, so...unworthy. Since it was my first challenge, I tried to follow the recipe verbatim. I didn’t even think about fancying up the thing

Next month, though...Fancyville, here I come.

Perfect Party Cake
Photobucket

For the Cake

2 1/4 cups cake flour
1 tablespoon baking powder
½ teaspoon salt
1 ¼ cups whole milk or buttermilk (I prefer buttermilk with the lemon)
4 large egg whites
1 ½ cups sugar
2 teaspoons grated lemon zest
1 stick unsalted butter, at room temperature
½ teaspoon pure lemon extract

For the Buttercream
1 cup sugar
4 large egg whites
3 sticks (12 ounces) unsalted butter, at room temperature
¼ cup fresh lemon juice (from 2 large lemons)
1 teaspoon pure vanilla extract

For Finishing
2/3 cup seedless raspberry preserves stirred vigorously or warmed gently until spreadable
About 1 ½ cups sweetened shredded coconut

Getting Ready
Center a rack in the oven and preheat the oven to 350 degrees F. Butter two 9 x 2 inch round cake pans and line the bottom of each pan with a round of buttered parchment or wax paper. Put the pans on a baking sheet.

To Make the Cake
  • Sift together the flour, baking powder and salt.
  • Whisk together the milk and egg whites in a medium bowl.
  • Put the sugar and lemon zest in a mixer bowl or another large bowl and rub them together with your fingers until the sugar is moist and fragrant.
  • Add the butter and working with the paddle or whisk attachment, or with a hand mixer, beat at medium speed for a full 3 minutes, until the butter and sugar are very light.
  • Beat in the extract, then add one third of the flour mixture, still beating on medium speed.
  • Beat in half of the milk-egg mixture, then beat in half of the remaining dry ingredients until incorporated.
  • Add the rest of the milk and eggs beating until the batter is homogeneous, then add the last of the dry ingredients.
  • Finally, give the batter a good 2- minute beating to ensure that it is thoroughly mixed and well aerated.
  • Divide the batter between the two pans and smooth the tops with a rubber spatula.
  • Bake for 30-35 minutes, or until the cakes are well risen and springy to the touch – a thin knife inserted into the centers should come out clean
  • Transfer the cakes to cooling racks and cool for about 5 minutes, then run a knife around the sides of the cakes, unfold them and peel off the paper liners.
  • Invert and cool to room temperature, right side up (the cooled cake layers can be wrapped airtight and stored at room temperature overnight or frozen for up to two months).
To Make the Buttercream
  • Put the sugar and egg whites in a mixer bowl or another large heatproof bowl, fit the bowl over a plan of simmering water and whisk constantly, keeping the mixture over the heat, until it feels hot to the touch, about 3 minutes.
  • The sugar should be dissolved, and the mixture will look like shiny marshmallow cream.
  • Remove the bowl from the heat.
  • Working with the whisk attachment or with a hand mixer, beat the meringue on medium speed until it is cool, about 5 minutes.
  • Switch to the paddle attachment if you have one, and add the butter a stick at a time, beating until smooth.
  • Once all the butter is in, beat in the buttercream on medium-high speed until it is thick and very smooth, 6-10 minutes.
  • During this time the buttercream may curdle or separate – just keep beating and it will come together again.
  • On medium speed, gradually beat in the lemon juice, waiting until each addition is absorbed before adding more, and then the vanilla.
  • You should have a shiny smooth, velvety, pristine white buttercream. Press a piece of plastic against the surface of the buttercream and set aside briefly.
To Assemble the Cake
  • Using a sharp serrated knife and a gentle sawing motion, slice each layer horizontally in half.
  • Put one layer cut side up on a cardboard cake round or a cake plate protected by strips of wax or parchment paper.
  • Spread it with one third of the preserves.
  • Cover the jam evenly with about one quarter of the buttercream.
  • Top with another layer, spread with preserves and buttercream and then do the same with a third layer (you’ll have used all the jam and have buttercream leftover).
  • Place the last layer cut side down on top of the cake and use the remaining buttercream to frost the sides and top.
  • Press the coconut into the frosting, patting it gently all over the sides and top.
Photobucket

Serving
The cake is ready to serve as soon as it is assembled, but I think it’s best to let it sit and set for a couple of hours in a cool room – not the refrigerator. Whether you wait or slice and enjoy it immediately, the cake should be served at room temperature; it loses all its subtlety when it’s cold. Depending on your audience you can serve the cake with just about anything from milk to sweet or bubbly wine.

Storing
The cake is best the day it is made, but you can refrigerate it, well covered, for up to two days. Bring it to room temperature before serving. If you want to freeze the cake, slide it into the freezer to set, then wrap it really well – it will keep for up to 2 months in the freezer; defrost it, still wrapped overnight in the refrigerator.

Playing Around
Since lemon is such a friendly flavour, feel free to make changes in the preserves: other red preserves – cherry or strawberry – look especially nice, but you can even use plum or blueberry jam.

Fresh Berry Cake
If you will be serving the cake the day it is made, cover each layer of buttercream with fresh berries – use whole raspberries, sliced or halved strawberries or whole blackberries, and match the preserves to the fruit. You can replace the coconut on top of the cake with a crown of berries, or use both coconut and berries. You can also replace the buttercream between the layers with fairly firmly whipped sweetened cream and then either frost the cake with buttercream (the contrast between the lighter whipped cream and the firmer buttercream is nice) or finish it with more whipped cream. If you use whipped cream, you’ll have to store the cake the in the refrigerator – let it sit for about 20 minutes at room temperature before serving.

Photobucket