April 26, 2016
Farro & Spring Vegetable Salad with Lemon Vinaigrette
February 12, 2015
Farro Risotto with Butternut & Kale
January 3, 2015
Hoppin' John
 |
| I'm a goon, but he's cute. |
 |
| And another...because WE are cute together. |
 |
| There's that silly fangirl look again. |
April 1, 2013
Cassoulet
According to Wall Street Journal writer Aleksandra Crapanzano:
"When Martha Stewart asked the founder of gourmet meat purveyor D'Artagnan about the hearty French dish of duck confit, garlic sausages and tarbais beans, Ariane Daguin responded in a thick Gascon accent that imparted culinary authority. 'Cassoulet,' she said, "it is not a recipe in France. It is a way to argue between villages.'"Crapanzano goes on to explain cassoulet's history, a dish that originated with "white beans, garlic, pork shoulder, sausages, [and] stale breadcrumbs." The name cassoulet refers not to the recipe itself but to the dish it's assembled and baked in.
When my friend Steph and I decided to make a traditional cassoulet for Easter, I began my research with the source of all French food: Julia Child's Mastering the Art of French Cooking. Julia's "French Baked Beans" recipe is 6 pages long. In the introduction, she explains:
"As cassoulet is native to a relatively large region of France, each part of which has its own specialties, arguments about what should go into this famous dish seem based on local traditions. Toulousains insist that it must include among its meats preserved goose, confit d'oie, or it is not a real cassoulet. [...] Then there are those who declare the cassoulet was born in Castelnaudary, and originally contained only beans, pork, and sausages. A heretical few suggest the cassoulet was not a French invention at all, but an adaption from the Arab fava bean and mutton stew. And so on, with variations and dogmatisms rampant."While a traditional cassoulet can be made with a variety of meats--duck, goose, pork, lamb--Julia says that "the important item is flavor, which comes largely from the liquid the beans and meats are cooked in." Her version is made with pork loin, lamb shoulder, unsmoked bacon & homemade sausage cakes.
In my cassoulet research, I also studied recipes from Michael Lewis (whose adaptation of Julia's recipe features duck confit, bacon, lamb bones, garlic-pork sausage & goose fat), Saveur (a tomatoey pork-extravaganza loaded with ham hocks, pork shoulder, pancetta, pork sausage & duck confit), Mark Bittman (which begins with a whole duck and finishes with bacon, lamb shoulder, seared duck breasts & garlicky sausage), Anthony Bourdain & Michael Ruhlman (a 3-day production layered with beans, pork sausage, more beans, pork belly, more beans, duck confit, and beans again with a caramelized onion & garlic puree between each layer), and Nigel Slater (his "unctuous meat and snowy white beans" version contains duck confit, pork shoulder, bacon & pork sausage with a breadcrumb crust that's stirred into the stew after an hour, then topped with more breadcrumbs & a drizzle of duck fat).
Slater writes:
"The perfect cassoulet is one that sends wave after garlicky wave of warmth from the end of your tongue to the tips of your toes. The beans are held in just the right amount of herby, tomatoey goo, the breadcrumb crust is crisp, and the first mouthful piping hot. It should contain haricot or broad beans, some fatty pork, garlicky sausages and a thick breadcrumb crust."I pieced together aspects of a few different recipes to create my own Frankenoulet, but I used Crapsanzano's recipe from the Wall Street Journal (which she adapted from Thomas Keller's Bouchon Bistro) as my starting point...forgoing her step to reduce the bean cooking liquid, adding caramelised onions to her garlic confit puree, layering the cassoulet in Bourdain/Ruhlman fashion, and baking the assembled dish uncovered for a couple hours before adding the breadcrumb topping.
Cassoulet isn't necessarily difficult to make; it just takes 3 days to prepare all the separate parts before baking the finished dish. Julia refers to this as "the order of battle." Day One: Make the duck confit (if you're making it instead of buying it) & soak the beans. Day Two: Cook the beans & make the garlic confit, then refrigerate overnight. Day Three: Finish the rest of the ingredients (make breadcrumbs, caramelize onions, cook pancetta & sausage), assemble the cassoulet & bake.
As Bittman says, "[...] cassoulet isn’t that demanding; it just takes time, and I’m here to say: You can do it."
And you CAN do it. WE did. So go do it already!
1 bay leaf
1 large garlic clove, peeled
6 peppercorns
1 sprig fresh thyme
1 onion, peeled and halved crosswise
1 carrot, peeled and halved crosswise
1 piece bacon skin or trimmings (about 2 ounces) *
4 quarts freshly-made chicken or duck stock
* I used the skin from the pancetta.
For the cassoulet:
2 tablespoons olive oil or duck fat
1 pound pancetta, diced into lardons
1 pound garlicky sausages
confit from 1 whole duck
1½ cups garlic confit puree (recipe below)
For the garlic confit puree:
2 heads of garlic, cloves separated & peeled
olive oil, as needed
2 onions, halved & sliced
salt & pepper
For the crumb topping:
3 tablespoons olive oil or duck fat
1 1/2 cups fresh breadcrumbs
3 tablespoons parsley, finely chopped
3 tablespoons thyme, finely chopped
salt & pepper
Day One
- Cover the beans with room temperature water and let sit overnight in a nonreactive bowl.
- Drain the beans and discard the water. Transfer beans to a large pot. Add bay leaf, garlic clove, peppercorns, thyme, onion, carrot & bacon. Cover with stock. (The beans should be covered throughout the cooking process by about 1 inch of liquid.)
- Bring to a light simmer and cook over low heat, uncovered, until fully tender. This could more than 2 hours, depending on what kind of beans you are using. Start testing after 90 minutes. When they are just tender throughout, turn off the heat and let cool to room temperature. Refrigerate beans in their liquid overnight (cover the pot).
- To make the garlic confit: Cut the root end off of the peeled garlic and place in a small saucepan. Add enough olive oil to cover the cloves by 1 inch. Set the pan over the lowest possible heat and cook gently. You should see very small bubbles in the oil but nothing that breaks the surface. If necessary, set the pan partially off the burner to achieve sufficiently gentle heat. Cook garlic, stirring occasionally, until cloves are completely tender when pierced with a knife, about 1 hour. Remove the pan from the heat and allow cloves to cool in the oil, about 1 hour. Then, pour the garlic and oil in a jar or covered bowl and refrigerate overnight.
- Drain the beans, discarding the vegetables and bacon but reserving the cooking stock. (If you used bacon fat or trimmings--not skin--save it to add to the garlic puree.)
- To make the garlic confit puree: Caramelize the sliced onions (seasoned with salt & pepper) in a few tablespoons of the oil from the garlic confit. Puree the onion & the drained garlic cloves in a food processor or blender until smooth. Add some of the garlic oil if needed to make a smooth paste. (If you used bacon fat or trimmings in the beans, you can add it to the garlic puree as well.)
- Heat olive oil or duck fat in a skillet over medium-high heat and cook the pancetta until lightly browned but not crispy. Remove from the pan with a slotted spoon.
- In the same pan, brown the sausages. Remove from pan & set the aside. (If you don't want whole sausages in your cassoulet, let them cool a little bit and slice them into 1-inch pieces.)
- Start layering the ingredients in a large heavy-bottom dutch oven. Star with a layer of beans, then add the sausages, some of the garlic confit puree, another layer of beans, the pancetta & duck confit, more of the garlic puree, then the rest of the beans.
- Add the reserved bean cooking stock, enough to just barely cover the beans.
- Bake uncovered for two hours. The cassoulet should be moist but not soupy. Check the beans for doneness; they should be soft and creamy.
- Meanwhile, combine all of the ingredients for the crumb topping. Sprinkle the cassoulet with the crumbs. Bake an additional 15 minutes, or until the topping is evenly browned. (We increased the oven temperature to 400 for this step, then finished with a couple minutes under the broiler for a crunchy topping.)
- Behold your gorgeous creation and rejoice because you are now a culinary badass.
- Serve immediately.
March 10, 2013
Homemade Maple Granola
The first recipe I made was her maple granola, because I've never made granola before. It's easy to do...just mix everything in a bowl, spread it on a cookie sheet, and bake! This recipe is loaded with oats, walnuts, coconut, & dried cherries and flavored with maple & cinnamon.
December 9, 2009
Quinoa Pilaf with Sweet Potatoes, Spinach, and Bacon
First of all, I can't seem to figure out why the bold feature won't undo itself on the text in this post (or why some of the text is bigger than the rest). I've tried selecting all the text and pushing the "b" button & resizing the text, but it doesn't work. So, this post is in bold. With some bigger letters. Deal with it.
For those of you who've been asking, there are NO wedding plans yet. We've talked about a couple possibilities, and even though I want to do something simple, we are running into a few snags (mainly WHEN to get married). I thought I had the perfect plan: Spring break, Vegas ceremony early in the week, pig roast reception later in the week. But that's probably a little too soon for our budget and a Vegas wedding/outdoor reception in the summer doesn't seem like such a good idea. So, we're still working on it.
There is just over a week of school left before winter break. I still have a ton of papers to grade between now and then, but I've really been trying to not bring so much work home this year. All in all, I've had a fairly good year and am excited about some of the things going on in my classroom.I STILL haven't done any holiday decorating or shopping. I doubt we'll get a tree this year, since Jerad isn't done refinishing the floors yet. I suggested we not buy gifts for each other, since he just bought a ring and we should start saving for the wedding, but I don't think he's going to stick to that. So, I'll be shopping for gifts at the last minute like I always do.
Today, I simply don't have a story to tell about quinoa or making this recipe...other than that the way I got Jerad to eat it for dinner was to remind him that there was BACON in it & that the quinoa was toasted IN BACON FAT.
Oh, and, I've made quinoa before. If you're not sure what quinoa is, or even how to pronounce it, read that post.
Quinoa Pilaf with Sweet Potatoes, Spinach, and Bacon

According to Serious Eats: "Full of fiber and antioxidants, this is one-bowl meal you can feel virtuous about eating. The bacon contributes smoky flavor and a nice textural contrast, but you could leave it out if you wanted to make this a vegetarian dish. (In that case, skip the bacon step and instead sauté the onions in 1 tablespoon of olive oil.)"
2 to 4 slices of bacon, diced
1/4 large onion, cut in half and sliced thin
1 cup quinoa
1 1/2 cup water
1 teaspoon salt, divided
1 medium sweet potato, peeled & cut into 1/4-inch cubes
8 ounces baby spinach
2 tablespoons olive oil
My notes: First of all, when a recipe calls for 2-4 slices of bacon, I'm going to go with 4...because when it comes to bacon, more is always better. Right? Right. This, however, meant that I had too much bacon fat left in the pan. So, I drained some out until there was just a thin layer left in which to toast the quinoa.
- In a medium saucepan cook the bacon over medium heat until the bacon is crisp and the fat is rendered, about 10 minutes. Reserve the bacon bits.
- Saute the onions into the hot bacon fat, stirring occasionally, until the onions soften, about 5 minutes. Add the quinoa and toss until coated with the fat and the grains are slightly toasted, about 2 minutes more. Add the water and 1/2 teaspoon of the salt, bring to a boil, stir once, cover, reduce to low and let cook undisturbed until the water is absorbed and the quinoa is tender, about 15 minutes.
- While the quinoa is cooking, toss the sweet potatoes with the olive oil and salt and cook in a medium skillet until the potatoes are tender, about 15 minutes.
- When the quinoa is cooked, stir in the spinach & cook until the spinach is wilted. Add the sweet potatoes and reserved bacon.
- Serve with a sprinkling of freshly grated Parmesan cheese.

November 3, 2009
Mirrasou Wine, Mia Rosa, & Polenta Fries
However, when I received an invitation to attend a wine dinner with Mirassou Winery at Mia Rosa, a local Italian bistro, I jumped at it. Here was a chance for me to not only score a free dinner but to also give props to a local chef and a family-owned winery.
Mirassou Winery is owned by the country’s oldest winemaking family; they recently celebrated their 155th anniversary. To celebrate, David Mirassou (6th generation) visited six cities in the country where he hosted wine dinners for bloggers and media folks. As part of the tour, he also unveiled an online cookbook--Taste & Toast--featuring recipes from the restaurants that housed the wine dinners.
David told us an interesting story about the start of his family’s winery. In 1854, Pierre & Henrietta sailed to California from France with their prized grapevine cuttings. They were reprimanded by the ship’s captain for using too much water to keep the plants alive, so Pierre purchased all of the potatoes onboard and inserted the cuttings into pieces to keep them alive.
The wine dinner was held at Mia Rosa (4501 Manchester). The rustic Italian restaurant is manned by chef-owner Philip Noe (who also teaches cooking classes at Kitchen Conservatory). Chef Noe took time to prepare dishes that actually paired with the wines.
Our menu for the night consisted of six-courses with seven wines:
2008 Pinot Grigio
Roasted Garlic & Roma Tomato Flat Bread
2008 Sauvignon Blanc
Gorgonzola Polenta Fries (recipe below)
2007 Chardonnay
Smoked Scallop Carpaccio
Pinot Noir
Warm Beet Salad with Goat Cheese on Spinach
Merlot
Veal Medallions on Garlic Mash with Tarragon Broth
2006 Cabernet Sauvignon
Zeppole with Chocolate Sauce
2007 Riesling
The food was absolutely amazing and paired quite nicely with the wines. My favorite dish of the night was the smoked scallops..so tender & flavorful. Another favorite was the polenta fries. I could have eaten those all night! All in all, I was very happy with the food. I look forward to going back to Mia Rosa for dinner sometime soon.
As for the wines, I started out the night taking detailed tasting notes but after a few glasses (ok, SEVERAL glasses), I either neglected to write stuff down or my handwriting was too ineligible. Here’s what I do remember...
The sauvignon blanc was smoother and more “buttery” than the pinot grigio.
The chardonnay had a “cleaner” mouth feel than a typical chard, mainly from being partially fermented in stainless steel.
Then I wrote something that looks like a pound sign next to the word “merlot.” At least, I THINK that says merlot.
Sheesh.
Makes 8 servings
2 cups water
2 cups heavy cream
1 teaspoon minced garlic
salt & pepper to taste
1 1/2 cups yellow cornmeal
1 cup crumbled Gorgonzola cheese
6 cups canola oil
- Bring water, cream, garlic, salt & pepper to a boil in a medium saucepan. Slowly whisk in the cornmeal.
- Cook over medium-low heat until the mixture begins to thicken, then stir in the cheese. Cook, stirring vigorously, for about 5 minutes more or until mixture is a thick as bread dough.
- Spread mixture 1/2-inch thick on a baking sheet & refrigerate for 1 hour.
- Cut into 1/2-inch strips resembling French fries.
- Heat oil to 325 degrees in a large, deep pan. Carefully cook fries in hot oil until golden brown. Remove with a slotted spoon and drain on paper towels. Serve immediately.
November 5, 2008
President Obama's Family Chili Recipe
I am SO happy about the election results. You have no idea. The last two elections were deeply disappointing to me. I couldn't believe, especially, that this country elected Bush to a second term. It baffled--and stunned--me. It made me sad.
Yesterday's election results give me such hope for this country. It makes me proud to call America my home...and that's something I don't think I've ever said before!
Last night, I made a pot of Obama's---PRESIDENT Obama's (I can't say it enough!)--chili for dinner while watching the election results.
1 green pepper, chopped
Several cloves of garlic, chopped
1 tablespoon olive oil
1 pound ground turkey or beef
1/4 teaspoon ground cumin
1/4 teaspoon ground oregano
1/4 teaspoon ground turmeric
1/4 teaspoon ground basil
1 tablespoon chili powder
3 tablespoons red wine vinegar
Several tomatoes, depending on size, chopped
1 can red kidney beans, drained
- Saute onions, green pepper and garlic in olive oil until soft.
- Add ground meat and brown.
- Combine spices together into a mixture, then add to ground meat.
- Add red wine vinegar.
- Add tomatoes and let simmer, until tomatoes cook down.
- Add kidney beans and cook for a few more minutes.
- Serve over white or brown rice. Garnish with grated cheddar cheese, onions and sour cream.
October 18, 2008
Pepin's Middle Eastern Couscous with Saffron
Someone asked him about the book at the signing on Wednesday. He said that this is how he cooks at home during the week when he is in a rush. He mentioned some of his favorite quick meals, including buying a rotisserie chicken from the supermarket, cutting it up, plating it over Boston lettuce leaves, and topping with a quick sauce.
The recipes in More Fast Food My Way are like that. However, there are a few recipes that sound good and peak my interest...like turkey scaloppine with dried morels, sausage patties with pumpkin seeds & mushrooms, lamb curry, pumpkin gratin, Tibetan flatbread, and Seckel pears in coffee.
I tried his Middle Eastern Couscous with Saffron tonight. I bought some of the couscous earlier this week, because I've never tried it before. So, I was excited to see this recipe.
Pepin writes: In the last few years, a larger, pebblelike variety of couscous, known variously as Israeli, Middle Eastern, Moroccan, or Italian couscous, has appeared on the market. Like instant couscous, it is made of semolina, but is grains are much larger, about the size of peppercorns. For this recipe, I cook the couscous covered for about 10 minutes and then uncover it and cook it for for a few minutes longer, stirring occasionally, to produce loose, soft, tender grains that are neither sticky nor soupy. I season the dish with onion and saffron and add pumpkin seeds for crunch.

2/3 cup finely chopped onion
1/4 cup pumpkin seeds *
1 teaspoon crushed saffron pistils
1 cup Israeli couscous
1 1/2 cup chicken stock
1/4 teaspoon salt
1/4 teaspoon pepper
4 sprigs fresh tarragon or parsley, for garnish
* Kelly's note: I used sunflower seeds because I couldn't find shelled pumpkin seeds.
- Heat the oil in a medium saucepan over high heat and add the onion, seeds, and saffron. I would recommend using a non-stick pan. Cook for 1-2 minutes.
- Add the couscous, mix well.
- Add the stock, salt, and pepper. Mix well and bring to a boil.
- Reduce the heat to very low, cover, and cook for 10 minutes.
- Uncover and cook over medium heat, stirring occasionally, for 2-3 minutes longer to dry the grains and make them fluffy.
- Serve garished with the herbs, if desired.

July 27, 2008
Sher's Lentil & Spinach Patties
Though I'd only recently discovered Sherry's blog, I had already bookmarked a few of her recipes. I chose to make the lentil & spinach patties, a recipe she posted for WHB earlier this month, for lunch yesterday.
(with just a few small adaptations)

8-10 ounces spinach, stemmed and sauteed
1 tablespoon cumin
1 tablespoon dried oregano
3 tablespoons bread crumbs
salt and pepper to taste
1 egg
2 tablespoons oil
- Cover lentils with water in a medium saucepan and boil for 2-3 minutes, then reduce the heat and simmer until tender (about 10 minutes).
- After cooking the spinach, be sure to squeeze all the liquid out. The easiest way to do this is with a potato ricer.
- Mix the spinach, lentils, cumin, oregano, & bread crumbs together in a bowl. Season to taste with salt and pepper. Mix in the egg and chill the mixture in the fridge for at least 30 minutes.
- Heat the oil in a non-stick frying pan. Form the patties by forming a ball in your hand, then carefully patting it into a patty. Large, thin patties will not stay together, so make them smallish. Slip each patty into the skillet and press the patty together with a spatula if they break apart. Brown on each side over medium high heat, then carefully remove each patty to a plate.
- Top with salsa or sauce of your choice. I topped each patty with a bit of crumbled feta cheese and a drizzle of extra-virgin olive oil.
- This is really good; the lentils get kind of crunchy on the outside.
- Next time, I'll chop up the cooked spinach.
- I used a small disher to form balls that I flattened slightly before frying. Be careful not to squish the patties while they're cooking; they'll fall apart.
- This would have been extra tasty with chopped tomatoes or roasted red pepper sauce on top.
- I also think the mixture would be good just cooked in a bit of olive oil (maybe with a bit of sausage or something), without being made into patties.
July 23, 2008
Quinoa: How to Pronounce It, Cook It, & Eat It
As a food blog browser, it's easy to notice foodie trends...because everyone is writing about them! Take quinoa for instance. I'd never heard of it before. It's only been in the past few months that I've noticed quinoa recipes popping up all over the world of food blogs.
Of course, since I'd never cooked or eaten quinoa, I immediately put in on my list of "things to try."
First, there is the issue of pronunciation. I had been saying it like "kwin-OH-ah." Come to find out, it's pronounced like "KEEN-wah."Then, there is the question of classification. What is quinoa exactly? According to Cookthink: Quinoa is a seed that, if not harvested, will sprout a leafy vegetable. While the leaves can be eaten, quinoa is primarily grown for the seeds. A "pseudo cereal" native to the
Gluten-free, and easy to digest, quinoa has all the goods that grains and seeds are supposed to have (dietary fiber and so on). The real kicker though? Quinoa has the highest protein levels (up to 20%) of all the cereals -- pseudo or otherwise.
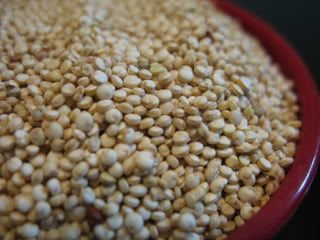
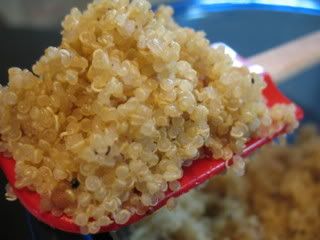
Quinoa is tiny; it reminds me of sesame seeds.
This is only a 1/2 cup measuring cup full.
How to Cook Quinoa
1/2 cup quinoa
3/4 cup water
1/8 teaspoon salt
1/8 teaspoon black pepper
*Note: Most recipes call for rinsing & draining the quinoa, but I found it to be pretty difficult to do without a very fine mesh strainer. Even then, the quinoa seeds are so tiny...I ended up just making a mess trying to get the wet seeds from the strainer into a pan. So, I started over and didn't rinse. It turned out fine. I would just pick over the quinoa to make sure there isn't anything unappetizer lurking about.
Directions:
- In a medium saucepan, combine all the ingredients. Bring to a boil, then cover and reduce to a simmer.
- Simmer for about 12 minutes, or the water has been absorbed and the quinoa has puffed, become translucent, and opened (you'll see the curly-q inside).
- Remove the pot from the heat and let rest, covered, for about 5 minutes.
- Fluff the quinoa with a fork before serving.
For more sweet & savory quinoa recipes, see Heidi Swanson's 101 Cookbooks.
May 29, 2008
A Fiasco in the Kitchen
"Um, literally or metaphorically?" I replied.
"Literally, a fiasco in the kitchen," Anne said.
Images of stove fires, out-of-control countertop appliances, knife accidents, and smoke-billowing ovens flashed through my head.
Anne explained that a fiasco, which is Italian for "flask," is the name of a Tuscan bean cooker. She's just been given one as a gift and suggested that we try it out one day soon.
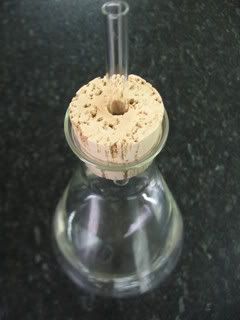
A fiasco is a large glass flask, very similar to the kind you'd find in chemistry class, with a cork top that has a glass tube running through it. It was originally designed for use in a hearth fire; cooks would put a fiasco of beans on the embers at night, and they would be ready to eat in the morning.
The name, however, apparently has double-meaning. Those glass beakers have been known to break on the stove a time or two. During her research online, Anne came across one man who said he was on his third fiasco. "This could be fun," I thought. And, I made sure to bring my camera to work just in case we had a fiasco of our own.
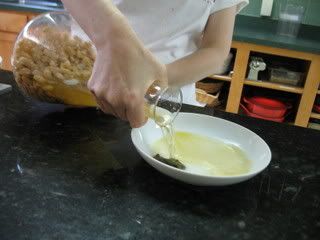
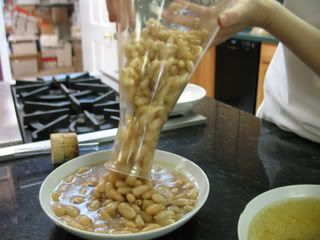
The directions were pretty vague...and in Italian. We were to put the beans with water, olive oil, basil, rosemary, garlic, salt & pepper into the flask, then cook it for 40-50 minutes. So, that's what we did.
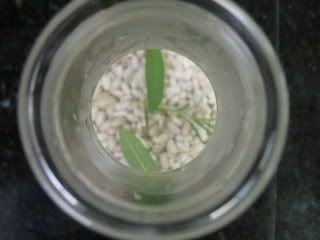
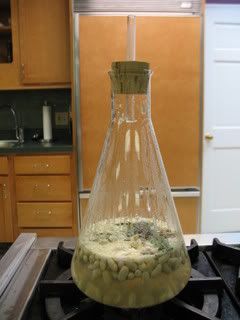
[un]Fortunately, no fiasco took place in the kitchen that day. We had to wonder, though, were beans cooked this way any better than if they'd just been cooked in a pot? We didn't think so.
I think the fiasco is just a reminder of the traditional Tuscan way of bean cooking...and a more attractive way to cook beans. I mean, if you have to have a pot of beans cooking on the stove for an hour or two, it might as well be done in a pretty vessel.
April 18, 2008
Falafel Bento
I altered Nicole's version slightly, using canned garbanzo beans instead of pinto beans, omitting the cilantro (it tastes metallic to me), and not coating them in bread crumbs before frying.
Ingredients:
1 can garbanzo beans, drained
1 big bunch of flat leaf parsley (about 2 handfuls)
1 small onion
1 teaspoon baking powder
4 cloves garlic
2 teaspoons cumin (powder)
2 teaspoons coriander (powder)
1/2 teaspoon paprika
1/2 teaspoon dry oregano [I actually used fresh]
1/4 teaspoon red pepper flakes
1 teaspoon salt
1 cup bread crumbs
Olive oil for frying
Directions:
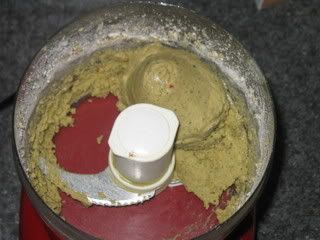
Place everything but the bread crumbs in a food processor and puree until the dough forms a ball.
Add the bread crumbs a little bit at a time and pulse until combined. Once it gets a bit harder, Once the mixture is thick enough--not too dry that it crumbles and not too wet that it falls apart--form into patties.
The patties should be slightly moist. Fry in olive oil until golden brown on each side.
I thought the patties seemed a bit too moist in the middle, so I put them in a hot even for a few minutes. Overall, they puffed up nicely and were really flavorful. I will definitely make these again!
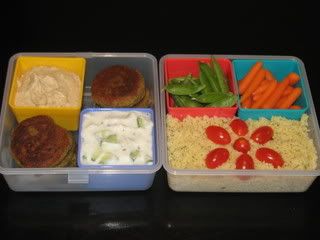
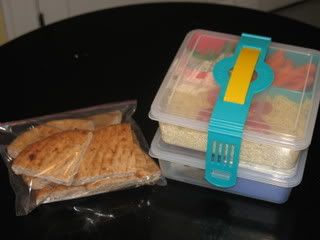
I packed the falafel with hummus, cucumber & yogurt sauce, couscous with tomatoes, carrots & sugar snap peas, and pita.
March 26, 2008
Quick Cassoulet
I've looked at several cassoulet recipes, but ultimately decided that it would be easier and cheaper to order it at a restaurant than make it at home...duck confit and all. Alas, I never went out for cassoulet this winter.
Instead, I made a quick version of cassoulet for dinner on Sunday--with chicken, sausage, bacon, & beans--adapted from one of those little Pillsbury cookbook pamphlets you see in the supermarket checkout lane. It's the first, and only, one I've ever bought, but I wanted to see if the recipes were any good.
I really liked this cassoulet, which is actually just a hip, fancy way to mean casserole (casserole is like so 1970s)...and I will definitely make it again.
Prep Time: 30 minutes. Start to Finish: 1 hour, 15 minutes.
Makes 6 servings.
4 slices thick-cut bacon, cut into 1-inch pieces
6 chicken thighs
1 cup baby carrots
1 medium onion, chopped (1/2 cup)
dried thyme leaves
salt
black pepper
12 ounces Polish sausage, cut into 1/2-inch pieces
2 cans (15 oz each) cannellini beans, drained & rinsed
1 can (14.5 oz) diced tomatoes with garlic
Directions:
- Heat oven to 350.
- In a 12-inch nonstick skillet, cook bacon over medium-high heat until crisp. Remove & drain on paper towels. Reserve 1 tablespoons of drippings.
- Season chicken with salt, pepper, & thyme. Add chicken, skin side down, to skillet. Cook, turning once, until brown on both sides. Remove from pan.
- Add carrots & onion, season with a pinch of salt & pepper, to pan and cook about 5 minutes.
- In an ungreased 13x9-inch baking dish, mix sausage, beans, tomatoes, bacon, carrots & onions, and a teaspoon of thyme. Top with chicken, skin side up. Cover with foil.
- Bake 30-45 minutes, or until the chicken is cooked through (the juice should run clear & meat should register 180 degrees).
February 28, 2008
Eat This: Crockpot Oatmeal
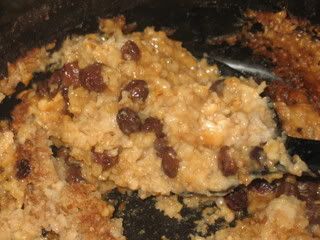
Ingredients
1 cup steel cut oats (not instant or rolled oats)
3-4 cups water, depending on how long the oatmeal will cook
1/2 tsp. cinnamon
1/4 cup brown sugar
1/2 tsp. vanilla
1/4 cup raisins
1/4 cup dried cranberries
1/2 cup walnuts halves
- Spray crockpot with nonstick cooking spray. If you're planning to cook the oatmeal 8 hours or longer, use 4 cups of water. If you want to cook it less than 8 hours, use 3 cups of water.
- Put all ingredients except nuts in slow cooker, cover, and cook on low overnight.
- Just before serving, stir in walnuts & a splash of milk (if desired).
February 25, 2008
Oatmeal Raisin Cookie Oatmeal
However, over the past year I've come to appreciate a heartier breakfast...waking up earlier to cook up a few eggs, maybe some bacon, and actually sit down to eat. And now, I am a mess all day if I don't have breakfast.
On Friday, before I went to work at the winery, I made a small pot of oatmeal inspired by a recipe I saw at Veggie Terrain. We'd had snow, sleet, and cold temperatures for a few days and I needed something warm and soothing to start the day.
I'd never eaten steel-cut oats before, the kind that are supposed to be really good for you but take forever to cook, so I decided to use those for my breakfast.
Here's what I did:
Stir 1/2 cup of steel-cut oats & 1/2 cup raisins into 2 1/2 cups of briskly boiling water. When it begins to thicken, reduce heat and simmer for 30 minutes, stirring occasionally. Add a bit more water, when needed, to retain creamy texture.
When the oats are tender, remove from heat and stir in 1/2 teaspoon vanilla extract, 1 tablespoon brown sugar (or more to taste), dash of cinnamon, & 1/4 cup chopped walnuts.
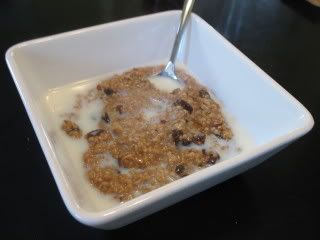
Put oatmeal in a bowl and top with milk.
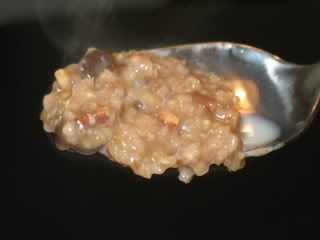
The steel-cut oats are a completely different texture than rolled oats. They are little nubbins of oats that, despite cooking for a half hour, retain a chewy "al-dente" kind of texture.
February 21, 2008
Pantry Raid!
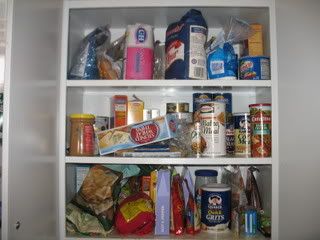
Since I'm homebound today, I figured it would be a good time to make something for Eating Out Loud's Food Fight event...a pantry raid! The rules are simple: Pick a random day (preferably not after you've just completed a shopping trip), take a picture of your pantry, then prepare a dish with several key ingredients from the pantry.
Easy, breezy.
Here's what my pantry/food cabinet looks like:
At first, I considered making something with pasta, beans, & tuna (things I always have on hand), but it was only 1:00 and I wanted something more "brunch-like," more rib-stickingly filling.
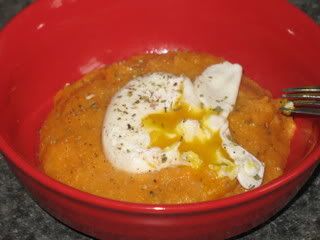
So, I made tomato herb polenta & poached eggs with:
2 cups water
1/2 cup corn meal
1 tablespoon fresh rosemary, finely chopped
1 teaspoon dried oregano
1 garlic clove, crushed
salt & pepper
1/2 cup grated Parmesan cheese
1/2 cup marinara sauce
2 eggs
olive oil, for drizzling
- Bring the water to a boil in a non-stick saucepan.
- Stir in the polenta, and stir until it thickens.
- Add the herbs, garlic, a pinch of salt, & a couple cranks of black pepper.
- Put a lid on the pan and cook on low for 5 minutes.
- Poach the eggs in simmering water, drain.
- Remove lid & stir in cheese & marinara sauce.
- Spoon polenta into 2 bowls. Drizzle with olive oil. Add an egg to each.
- Sprinkle with salt, pepper, and a bit more oregano & cheese (if desired).
February 15, 2008
Lentils & Sausages, Slater-Style
 Last fall I made a lentils & sausages recipe from Nigella Bites
Not so much.
The lentils were bland, and the sausages didn’t create enough “garlicky, winey gravy” to add anything special. I don’t know if the recipe or my ingredients were to blame; I used standard supermarket-brand brown lentils & smoked turkey sausages with sun-dried tomatoes. I was so unimpressed with it that I didn’t even bother to blog about it.
I vowed to try another sausage & lentils recipe some day.
Well, that day was Tuesday.
I made “Sausages with Salami & Lentils” from The Kitchen Diaries: A Year in the Kitchen with Nigel Slater
Before I give you the recipe, let me explain how much I adore Nigel Slater. I read his memoir Toast
What I love most about Slater’s writing is how he describes food. For example, he includes a recipe for “a lovely, wobbly mayonnaise” in Appetite. He loves preparing food, and it shows in his writing. He’s very inspiring.
Of his warming, satisfying take on lentils & sausage, he writes:
A rough-edged casserole that gives the impression of having been cooked for hours, but which is pretty much ready to eat in 45 minutes. You could put it in the oven if you prefer, in which case you should let it cook for about an hour at moderate heat. This is the sort of food I like to put on the table for Saturday lunch, with a bowl of rocket [arugula] salad by the side. Then you can swoosh the salad leaves around your plate to mop up the last bits of tomatoey lentil sauce. Serves 2 with seconds.
You'll need:
2 medium onions, peeled & cubed.
2 tablespoons olive oil.
2 garlic cloves, peeled & sliced thin.
6-7 ounces salami, peeled & cut into “fat matchsticks”.
12 ounces fresh Italian sausages. (I used four.)
3/4 cup green French lentils, rinsed.
1 3/4 cups crushed tomatoes.
2 cups water.
2 bay leaves.
1 tablespoon smooth Dijon mustard (optional).
- Warm the oil in a heavy-based casserole, add the onions and let them cook over a moderate heat until tender.
- Meanwhile, peel the garlic, slice it thinly and add it to the onions. Stir regularly.
- Add salami to the softening onions and leave for a couple of minutes, during which time the salami will darken slightly.
- Start cooking the sausages in a nonstick pan. You only want them to color on the outside; they will do most of their cooking once they are in the sauce.
- Tip the crushed tomatoes into the onions. (I love that Brit-speak!)
- Add the lentils and stir in water. Bring to a boil.
- Remove the sausages from their pan and tuck them into the casserole with the bay leaves. (I also added a pinch of dried oregano & thyme and some black pepper.)
- Cover the pot with a lid and leave to simmer gently for 20 minutes, then remove the lid and cook an additional 10 minutes to reduce & thicken the sauce a bit. (Check to see if the lentils are soft.)
- Stir the mustard (if using) into the lentils. Check for seasoning. You may find it needs little or no salt.
January 16, 2008
Curried Split Peas w/ Veal Meatballs
"Oh," he bellows with his arms outstretched, "it's so good!"
He won't give me the recipe though. He says it's not really a recipe at all, that it's too simple, that it's something only he really likes. All I've gotten out of him is that he cooks the legumes in vegetable stock. Beyond that, he's all hush-hush.
So, I had split peas on the brain when I saw The Well Seasoned Cook's "My Legume Love Affair" event and decided to try something with those little green buggers.
Sam's soup? A possibility. But, the smooth green soup just didn't appeal to me. It seemed too...
... (you know what's coming) ...
... (wait for it) ...
... Exorcist:

Anyway...
I was thinking more of a split pea stew or something. Curry sounded good.
However, I didn't find any recipes that had just what I was looking for. So, I just made one up.
Here's what I did:
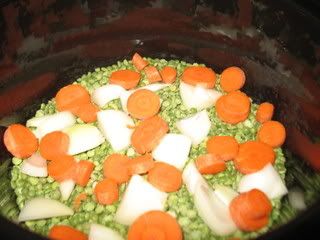
I put a package of dry split peas in the crockpot with one onion, two carrots, & two cloves of garlic (all roughly chopped). I added one can of chicken stock (fat free, low-sodium) & enough water to just cover everything (about 6 cups). I also added some salt, pepper, dried oregano, & 1 tablespoon of curry powder (though, I think it could have used more).
I set the crockpot to high and let it cook 4 hours, until the peas were tender. (Note: I did have to add about a cup or two more water after a couple hours).
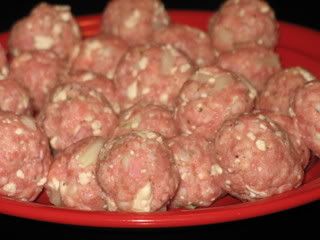
Meanwhile, I mixed one pound of ground veal (lamb was my first choice, but the supermarket didn't have any) with 1/2 finely chopped onion, 1 cup of crumbled feta cheese, salt, pepper, & dried oregano. I shaped meatballs about the size of a golf ball, browned them in a non-stick stick with just a bit of olive oil, then finished them in the oven (350 degree for about 10 minutes).
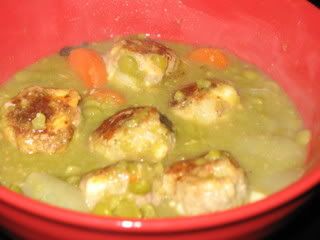
I put a few meatballs in a bowl, ladled the split pea stew on top, then sprinkled on some shredded parmesan.
The result? A pretty tasty supper!
My first attempt with split peas was just okay...good but not something I'd make again. I think I cooked them too long, as they were breaking down into mush.
My first homemade meatballs, however, were very juicy and flavorful, with a nice tangy kick from the feta (and really good the next day with a bit of marinara sauce on top!).


