Showing posts with label bread. Show all posts

August 8, 2017

Grandma's Homemade Bread

One of my favorite memories of my Grandma Green, my dad's mother, is watching her cook. She fried chicken in Crisco in an electric skillet...she rolled steamed cabbage leaves around meatballs and stewed them in tomato sauce..she mixed cooked macaroni noodles with shredded cheddar cheese, milk, & lots of black pepper...she baked the best bread.

I can still picture her hands--tanned, thin skin...fingers crooked with arthritis--kneading the dough.

Homemade bread was a meal in itself...warm from the oven, slathered with salted butter...sometimes with homemade blackberry jam.

Last fall, as I was cleaning out my dad's house, I found this:


It's Grandma's bread recipe, written by my dad. Apparently, before Grandma died in 2011 (she was 96), my dad watched her make bread and wrote down what she did.

In April, I tried this recipe. Things seemed to be going well. The dough rose as it should, and the loaf looked pretty good out of the oven.


However, when I cut it I noticed that the bread was too tense in the middle. I should have let it rise longer in the loaf pan pre-baking OR I should have just dumped it into the pan without rolling it up. I think it would have retained some of its lightness that way.


Nevertheless, it was fun to try this family recipe...and to decipher what dad's notes meant. Perfecting Grandma's homemade bread is my goal for the fall...stay tuned!

June 8, 2016

Roasted Eggplant with Grilled Flatbread


Whenever I'm feeling down or need to feel inspired, I watch cooking shows like Parts Unknown (or anything with Anthony Bourdain), Chef's Table, Michael Pollan's Cooked (a new Netflix series), and my favorite The Mind of a Chef

While the newest season of Mind of a Chef (season 4) isn't yet available on Netflix, you can watch two episodes on the show's webpage.

In the first episode, New York chef Gabrielle Hamilton roasts eggplants over a gas burner just like you would roast a red bell pepper. When the eggplants are charred and meltingly tender, she mixes the smokey flesh with lemon, garlic, and olive oil. This simple spread is served with grilled flatbread. 

I've watched that episode three times now.

Disclaimer: I know this does not make the most appetizing-looking dish. I couldn't even get my boyfriend to taste it. But trust me when I say that it is quite delicious. Think unpureed, unadulterated baba ganoush. Please. Just trust me.

Incidentally, this is perfect at room temperature, so it's a great addition to summer picnics. Leftovers are good when mixed with cooked pasta and cheese or layered in a lasagna.

Trust me.

Smokey Eggplant
from Prune by Gabrielle Hamilton


March 2, 2014

Lobster Rolls

When my friend Theresa came over last month to cook Coq au Riesling with me, we decided to make New England lobster rolls next time. I'd never eaten a real lobster roll, but we agreed that we had to make everything from scratch for it to be authentic--including cooking live lobsters, making mayonnaise for the salad, and baking fresh buns.

Lobster rolls are traditionally served on flat-sided buns that are buttered and toasted. According to the Boston Globe, "Variously called top-sliced, top-loading, or frankfurter roll, the style was developed sometime in the mid- to late ’40s, explains Michael Cornelis, vice president of American Pan, which makes baking pans for the industry. Howard Johnson’s approached J. J. Nissen bakery of Maine to develop a special bun for its fried clam strip sandwich. The restaurant chain wanted top sliced rolls that would stand upright and be easier to prepare, serve, and eat. […] 'Before the New England-style roll,' says Cornelis, 'there was no way to mechanically slice a bun part of the way through. If you wanted a roll pre-sliced, commercial bakers would slice them all the way through. Well, that’s not as happy a hot dog bun.'"

I borrowed Ruth's hot dog bun pan and followed the recipe on the King Arthur Flour website. In the end, they turned out just fine--albeit a little dense. Next time, I would buy good-quality buns (hubba) instead.

The lobster salad, however, was damn delicious. 

So, what do you think Theresa and I should cook next month?

Maine Lobster Rolls
recipe slightly adapted from Thomas Keller's Ad Hoc at Home


August 13, 2013

Artisan Bread in Five Minutes a Day

I recently came across a post by Zoe & Jeff, authors of Artisan Bread in Five Minutes a Day, featuring bread baked in a crock pot. "Genius," I thought. "No heating up the house to bake bread during the summer!"

Their basic white bread recipe makes four pounds of dough, enough for four loaves of bread. It's a simple technique: Simply mix the dough by hand and let it sit for 2 hours. At that time you can either bake a loaf or refrigerate the dough for a couple weeks, taking a pound out each time you want to bake some bread. It's stupid easy.

January 6, 2013

Quick & Easy French Baguettes

Browsing around on Foodgawker last week, I came across a recipe for "Quick and easy French bread, or the best thing ever." Since I do think that French bread is the best thing ever, I decided to give it a try (with a few small modifications)...my first attempt at baguettes. Just as the title states, the recipe is pretty dang easy; I had hot, crispy baguettes in just over an hour from start to finish.

This dough is simply mixed by hand and rises quickly. Two tools that I suggest are a non-stick, perforated baguette pan (for pretty, crispy loaves) and a Danish dough whisk (easier than a wooden spoon but won't get all gummed up with dough like a regular whisk).


Baking bread makes me so very happy...giddy, in fact. It was one of those "Look what I made!" moments. I just want to cuddle with these precious little loaves. Is that weird?

French Baguettes


makes 2 loaves

1 1/2 cups warm water
1 tablespoon sugar
1/2 tablespoon salt
1 1/2 tablespoons instant yeast (2 packages) *
3 cups all-purpose flour

*NOTE: Make sure to use "Rapid Rise" or instant yeast. If you use regular "Active Dry" yeast, your bread will be slighly doughy inside.
  • Mix the water, sugar, and salt in a large bowl. Sprinkle yeast on top & let sit 5 minutes. Stir.
  • Stir in 1 cup flour with a dough whisk or a wooden spoon, then mix in one cup more at a time until the dough no longer sticks to the sides of the bowl.  
  • Turn dough onto a well-floured surface (I like using a silicone pastry mat).  Coat hands (and the dough, if needed) with more flour to prevent any sticking & shape the dough into a log. Cut in half and gently roll each piece to form longer loaf shapes. 
  • Lay each loaf onto a non-stick baguette pan or a sheet pan lined with parchment or a silicone mat. Let rise in a warm place for 30 minutes. 
Pre-baked & unrisen: The dough is kind of craggily; don't be alarmed.
  • Meanwhile, preheat your oven to 400 degrees.
  • Spray the loaves with warm water (to create a crispy crust) & sprinkle with a tiny bit of kosher salt. 
  • Bake 20-30 minutes or until golden brown. Remove the pan from the oven & transfer the loaves to a cooling rack.

September 1, 2009

Grilled Fry Bread (and my panzanella recipe)

School has started again, which is why it’s been a while since my last post. People who aren’t teachers usually have no idea how time-consuming being a teacher really is. Between the lesson planning (always trying to come up with new & exciting projects, which students won't even do most of the time), reading & paper grading (the curse of an English teacher), there is little time for much else. Right now, I am teaching three different classes, including an American Studies class that is new to me. It’s a team-taught English & history class that we organized into themed units instead of chronological like usual.

Even though I’ve been busy with school for the past three weeks, we’ve still had some home-cooked meals...sausage & peppers with polenta, grilled London Broil, mustard chicken, panzanella. I’ve been making a lot of panzanella, my favorite summer recipe and a great way to use of overly ripe, late season tomatoes.

First, cube a baguette or other crusty loaf of bread (day-old works best but fresh is okay). Toss it with some olive oil, truffle salt, & pepper. Toast in a 350 degree oven until lightly browned & crunchy. Meanwhile, chop the tomatoes, add to a bowl & sprinkle with Kosher salt to let the juices flow. Add the toasted bread cubes & toss. Add diced mozzarella (or those tiny mozzarella pearls) & fresh basil (or chopped fresh rosemary). Taste. Add more salt & pepper if needed. If your tomatoes are particularly juicy, you may not need much else. If not, you can drizzle in some extra-virgin olive oil & a splash of red wine vinegar. I even like leftover panzanella the next day. If the bread is crispy (and old/dry) enough, it won’t get too soggy overnight. I even ate leftovers topped with a fried egg for breakfast.

I wanted to try a zucchini pasta recipe from the Chocolate & Zucchini cookbook last week, but I ended up making angel hair pasta with prosciutto & tomatoes in a rosemary cream sauce (an off-the-cuff kind of recipe) instead. I’ll get to that zucchini this week. I’m also thinking of making some moussaka with the farmers market eggplant I bought on Saturday.

I DID make one new recipe recently...grilled fry bread, from a Mexican grilling class I taught at Kitchen Conservatory.


Grilled Fry Bread

2 cups flour
2 tablespoons powdered milk
2 teaspoons baking powder
1 teaspoon kosher salt
2 tablespoons Crisco
2/3 cup hot water, or more if needed
2-3 tablespoons vegetable oil or melted butter


  • Place the flour, powdered milk, baking powder, & salt in a mixing bowl and whisk.
  • Add the shortening, cutting it in with a pastry blender. The mixture should be the texture of cornmeal.
  • Add enough hot water to obtain a soft, pliable dough.
  • Turn the dough onto a lightly floured work surface and knead for about 5 minutes. Wrap the dough in plastic wrap & let rest at room temperature for at least 30 minutes.
  • Divide the dough into 8 even pieces & roll each piece into a ball.
  • Working on a lightly floured surface, roll a ball into a thin disk 5-6 inches across. Place the disk on a floured baking sheet, then repeat with the remaining balls of dough. Keep the rolled-out dough covered with a damp cloth until your are ready to grill.
  • Heat a grill to high (or heat a grill pan on the stovetop). When ready to cook, brush oil onto the grate or pan. Brush the top of each disk with oil. Place a few disks, oiled side down, on the hot grill. Brush the other side with oil.
  • After 2-3 minutes, the bread will start to puff & blister and the bottom will become golden brown. Turn the bread over and grill the other side for 2-3 minutes longer.
  • Serve at once.
You can use this bread as a base for tacos (fill or top with meat, beans, & veggies), or you can sprinkle them with cheese to serve with a meal (add tomatoes for a meal). If you roll them out thin, you can crisp them on the grill until they are like crackers.


January 11, 2009

Homemade Honey Wheat Bread


I remember trying to make biscuits from scratch for homework in my junior high foods class. It was a disaster. The dough didn't rise, and the biscuits were hard as hockey pucks. My dad made fun of me for a while.

My Grandma Green used to make the best white bread...big, soft loaves that we'd eat warm with butter. My dad loved when Grandma would have a fresh loaf ready for us when we visited. My dad liked fresh bread so much that we'd even buy warm loaves at Silver Dollar City when we were on vacation and eat them with some blackberry jam we'd also purchased.

But, we never had fresh bread at home. My mom wasn't much of a baker, and my dad could only make pancakes and mayonnaise sandwiches.

Several years ago, I decided to make fresh bread and homemade jam for my dad for Christmas. The jam was good, but the bread was reminiscent of those biscuits...flat and dense. I tried a couple different recipes, but nothing turned out right.

That's why I was so excited to learn about the no-knead bread recipe last year...finally, a bread I couldn't screw up!

Tonight, however, I thought I'd try a traditional bread recipe again. I've mastered pie dough and pasta, so I was confident with mixing and kneading bread dough.

I was a little skeptical when I first kneaded the dough. It seemed hard, tough. It let it rise, thinking that it would never double...but after I moved the bowl to the radiator, it rose just fine.

I did notice that it didn't rise much more (if any) during baking, so I didn't get the big sandwich loaf I was hoping for. Nonetheless, it was pretty good!

Honey Wheat Bread


1 cup warm water
1 tablespoon half & half
2 tablespoons extra-virgin olive oil
2 tablespoons honey
1 teaspoon kosher salt
2 teaspoons instant active dry yeast (or 1 packet)
1 1/2 cups bread flour
1 1/2 cups whole wheat flour
olive oil for greasing bowl & pan
1 egg for egg wash
oats (optional)
  • Combine the first 5 ingredients into the bowl of a stand mixer & stir with a whisk.
  • Sprinkle the yeast on top of the wet ingredients, cover with a towel and let proof while you measure out the flour.
  • Add the flour to the yeast mixture & mix with a stand mixer fitted with dough hook just until the ingredients all come together to form a ball and now dry flour is left in the bottom.
  • Remove the dough from the bowl and knead by hand until it's smooth and elastic, about 10-15 minutes.
  • Please the dough in a greased bowl, turning to coat the dough. Cover with a towel and leave in a warm place to rise until doubled. (I set the bowl on top of the radiator.)
  • Punch the dough down, then knead for a few minutes until smooth. Form into a loaf and placed in a greased loaf pan. Let rise in a warm place until almost doubled in size.
  • Brush the top of the dough with the egg (mixed with a tablespoon of water) and sprinkle with some oats (if using).
  • Bake at 350 degrees for 30-35 minutes.
  • Remove from the oven and let cool in the pan for a few minutes. Remove the loaf and let cool on a wire rack.

February 27, 2008

I made bread!

Photobucket
Isn't she lovely?

In November 2006, American cookbook author and food writer Mark Bittman published an article about no-knead bread in the New York Times. Apparently, it's been all the rage since. I've come across no-knead bread recipes on dozens of food blogs and websites, and I finally tried one yesterday.

No-knead bread is a snap to make...all you do is mix a few ingredients together, let it rise for hours, then bake it in a Dutch oven.

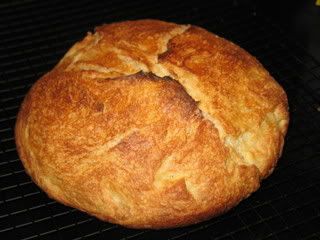
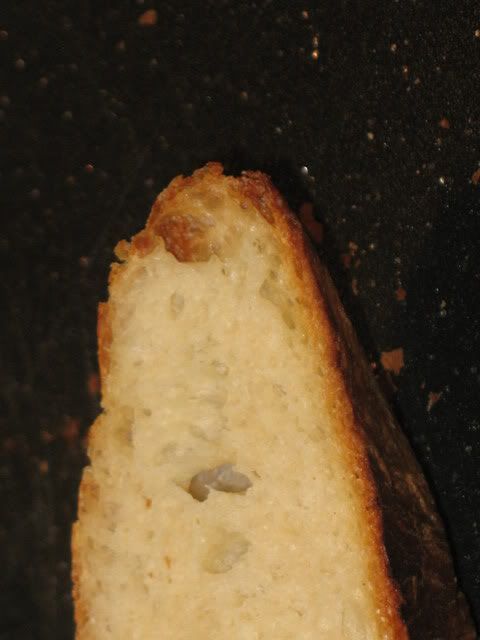
I can't explain how much I was impressed with this recipe...and myself for making it! The round loaf was crispy & brown on the outside and light & airy on the inside...very much like something you'd buy at an artisan bakery. No doughy bricks like I've ended up with in my previous bread-making attempts years ago!

Photobucket

I will definitely make this again...with fresh rosemary and garlic next time!

I used the recipe from Apartment Therapy (see their page for tips on proofing your dough and Dutch oven alternatives), one that has a much shorter proofing time than the original recipe (which calls for an 18-hour rise) :

(Quicker) No-Knead Bread
makes 1 loaf

3 cups bread flour.
3/4 teaspoon regular yeast (not instant). I used "active dry" yeast.
1 1/4 teaspoon salt.
1 1/2 cups water.

  • Mix all the ingredients in a big bowl. It will be a thick, slightly goopy dough. Mark Bittman calls it "shaggy." Cover with a towel or some plastic wrap and leave it in the warmest spot in your kitchen for a 6 to 8-hour rise. I put mine in the oven with the light on, since I have a fairly drafty kitchen.
Photobucket
  • After the dough has risen, lightly oil the counter or a cutting board and turn dough out on it. Shape it roughly into a ball, drizzle a bit of oil on top & rub it around, and cover with a towel or plastic wrap. Let proof for at least another hour.
Photobucket
  • Put an oiled Dutch oven in the oven and heat to 450°F. I let mine heat up about 10 minutes. Put the dough in the pan. You may have to pour it, pry it off the baking sheet, or just roll it in - the dough is very wet. Don't worry if it looks a mess.
Photobucket
  • Cover the pot with a lid and bake for 30 minutes. Remove lid and bake for another 6-15 minutes to let it brown. Mine only took 7 minutes to brown, but the bottom was a little burnt.
Photobucket

I ate a piece warm with butter, and I couldn't get over the fact that I'd made bread from scratch!

Photobucket

You could easily make this any week day...just mix the dough in the morning, let is rise another hour as soon as you get home, then bake it while you prepare dinner. I don't think a dough can over-rise, so don't worry too much about that 6-8 hour time frame. I let mine raise another 45 minutes or so at first.

And there are whole-wheat versions out there too!

I am so excited about this recipe...and so looking forward to the pounds I am bound to gain now that I can have fresh bread whenever I want it!